
We have managed to establish the tradition of putting together a DIY advent calendar each year in our family, and somehow it has become something that my children love and really look forward to almost as much as Christmas itself. I don’t blame them, what kid wouldn’t want to unwrap a new surprise each day as they count down to one of the most anticipated occasions of the year? It’s fun for them to participate in making the calendar too, and it was something that they really wanted to do and have been asking about for ages. I don’t want to spoil the surprise of what goes into each little parcel, so I came up with the solution of creating an Arty Advent Calendar, where they help to design the paper wrappings for each day but I do the rest and it has worked really well. They think that our calendar looks awesome and are really proud of themselves for doing such a good job. I have even made a printable of the number sheets we’ve used so that you can easily make one too.
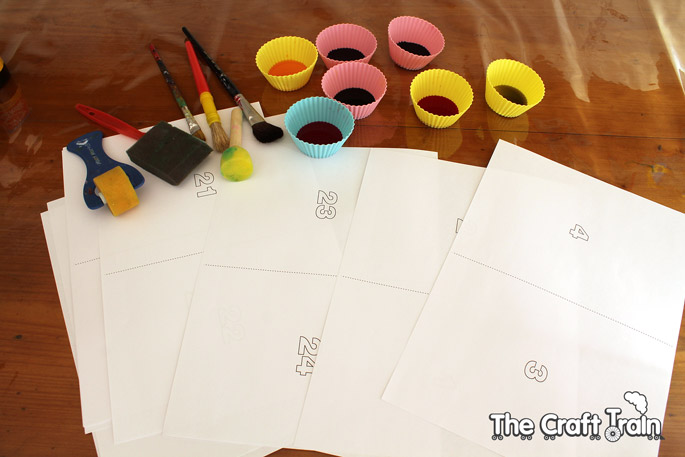
Once you’ve printed out the numbers (you’ll need 12 pieces of paper because there are two to each sheet) decorate them any way you like. We decided to go with liquid watercolours and large sponge brushes because I figured that the girls would get a bit over decorating the pages with so many to do and with liquid watercolours you can create gorgeous abstract paintings quickly with a few swipes of the brush, or slowly with a smaller brush if you’re in the mood. This was the first time we’ve used liquid watercolours and the girls absolutely loved the experience. I couldn’t resist painting a few number pages myself and experimenting with different techniques – it was lots of fun for me too!
The idea of decorating paper wrappings is extremely open-ended, suitable to all forms of process art and also suitable for all ages. Our results are not as chic as some of the advent calendars you’ll come across on Pinterest but it’s unique, fun and we loved making it. Decorate the number pages with any medium at all, but to make a calendar just like ours these are the materials you’ll be needing:
You will need
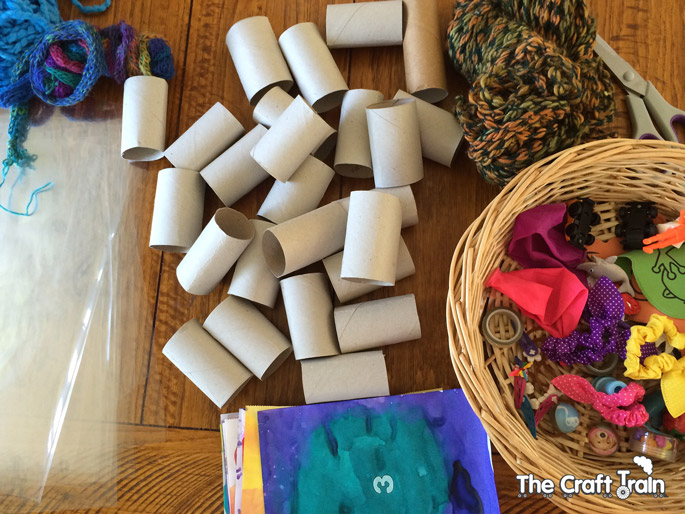
• Liquid watercolours – previously these have been difficult to find in Australia but I am beginning to see them stocked in local art and craft supply stores so keep an eye out
• Large sponge brushes
• Cardboard tubes (I’ve used paper towel rolls cut into 7.5cm lengths)
• Items to fill the calendar (I’ve used small pieces of stationery and little novelties)
• Clear cello wrap
• Chunky yarn, ribbon or string to tie the ends
• These printable numbers


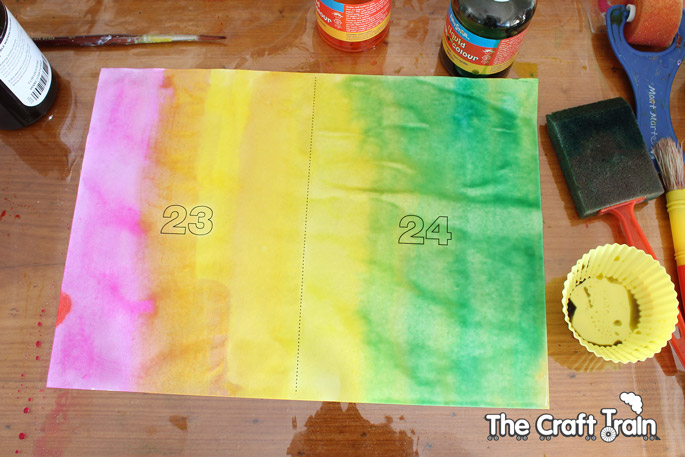
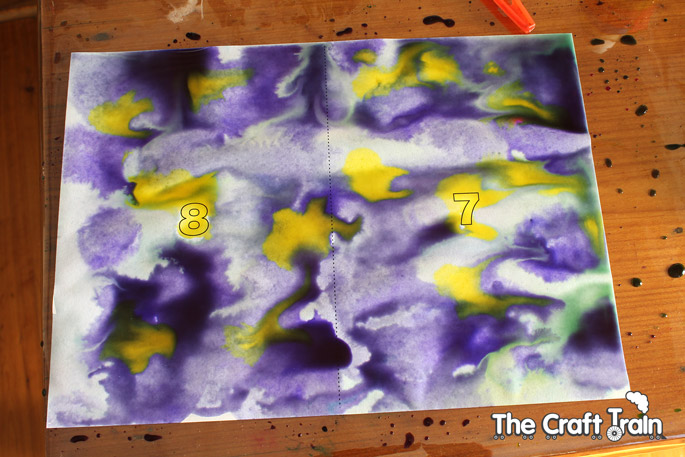
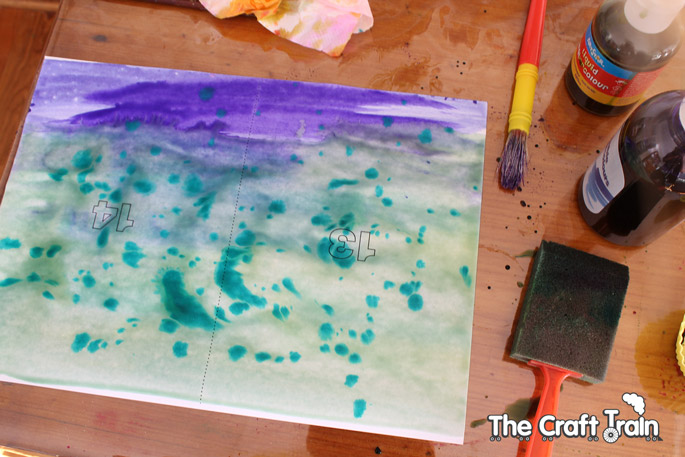
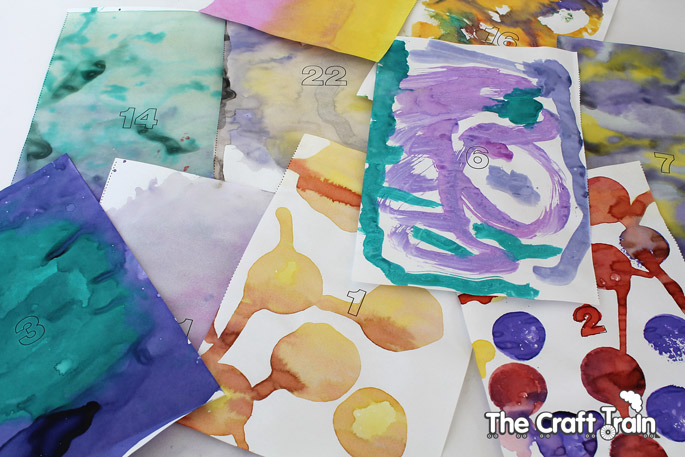
After our art dried I painted the numbers over with white paint to make them ‘pop’. They were still visible with the watercolour paint over the top as you can see in the picture above but I wanted to make them a bit easier to read.
Once you have your fabulous and unique art dry and ready to go you can wrap them around cardboard tubes stuffed with surprises.
When you are creating a DIY advent calendar you basically have three options for filling them:
- activities (free)
- chocolates (cheap)
- or novelties (not so cheap when you need 48 of them so there is one for each child in each package)
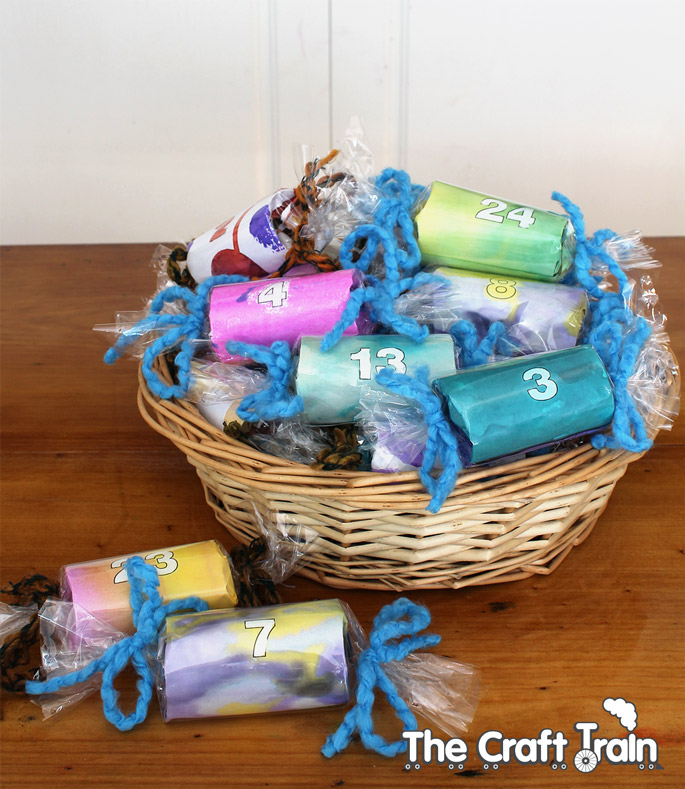
Sucker that I am, I opted for the novelty version and hit the dollar store party aisle to buy what can only be described as a bunch of plastic junk that we really don’t need (but that the kids will love anyway). I also bought chocolates so about a third of our packages have a chocolate instead of a novelty. It bothers me to see my kids eating chocolate every day but I don’t mind if it’s only once every few days. This year I have included stamps, plastic animals, bouncy balls, beads and string for threading, punching balloons and I did include a few useful items too that they would eventually need anyway such as hair ties, hair clips and mini erasers.
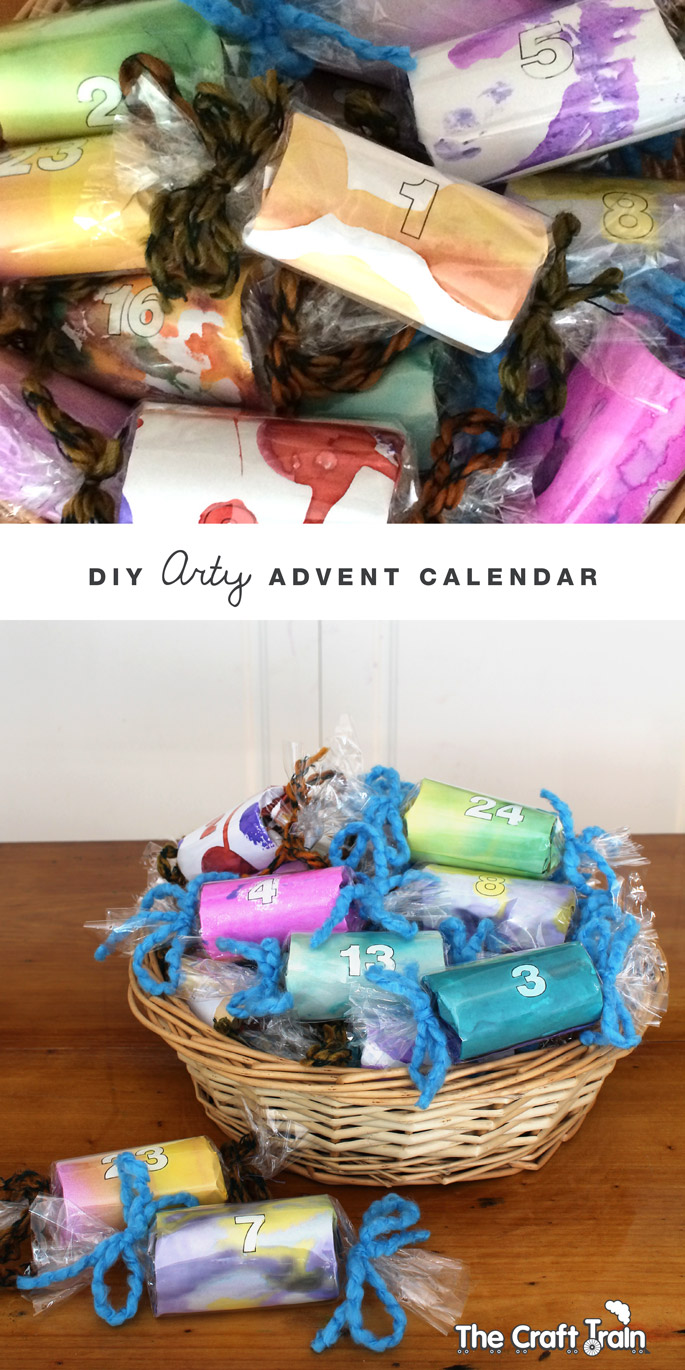
After they were wrapped in the artwork, I wrapped over it with clear cello wrap and tied with some chunky yarn.

To display them we’ve put them in a simple basket on the shelf.
I love the personal aspect to this calendar, and I love that the girls took an active part in helping to create it and now have a huge sense of satisfaction from what we made together. They are going to love opening a surprise each day for 24 days.
More advent calendar ideas
• Make an Advent tree with tie-died paper towel, or a countdown Christmas book calendar
• For a simple and fast idea try our paper bag advent calendar from last year
• Stuff your calendar with a new and interesting fascinating fact each day, we have a printable of 24 facts that are perfect for advent calendars
There are loads more ideas for Advent as well as Christmas crafts in general on our Christmas board on Pinterest. Are you following us?

Leave a Reply