Kids will love this symmetrical butterfly painting project! This is a perfect Spring craft for kids and makes beautiful wall art too.
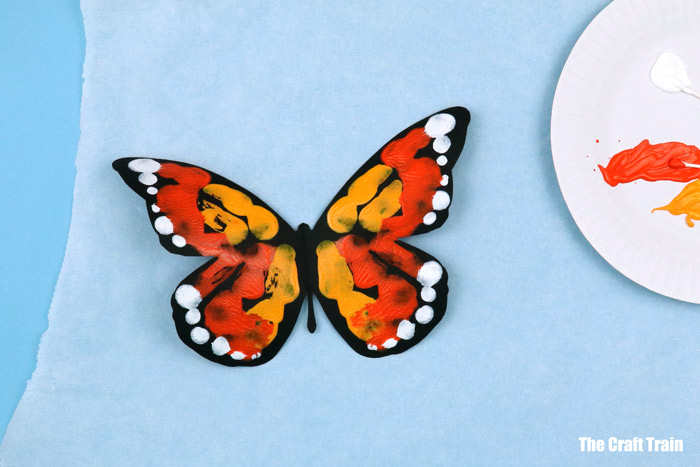
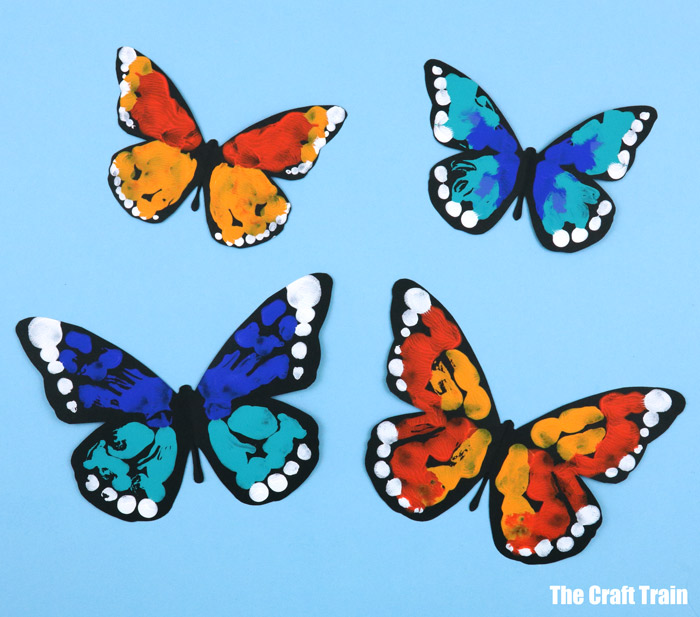
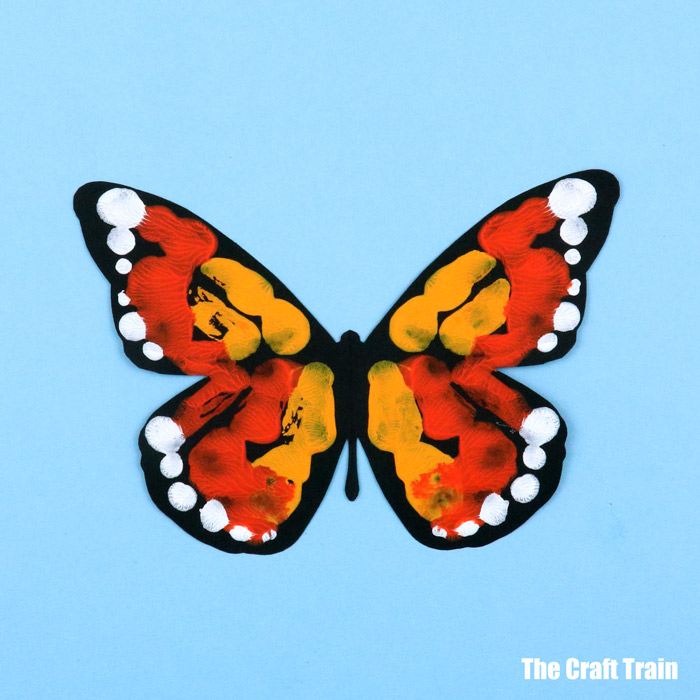
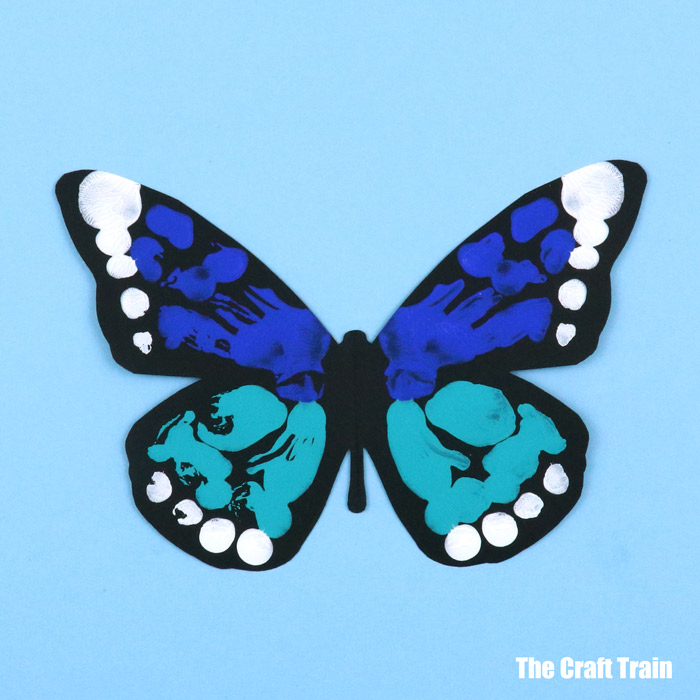
The butterflies we’ve created are loosely based on the monarch and blue morph species, but you could change the colours and make them look like any species of butterfly you like – or make up your own design.
You might also like our dragonfly squish art

Years ago I made some messy butterfly squish art with my girls. This article was going to be a re-make of the original with new photos and a video. But, while the concept is similar the result has turned out completely different so it’s become a whole new project.
Plus, I decided I like the photos of my cute little preschooler’s artworks way too much to replace them!
Butterfly painting is a fun way for kids to explore symmetry and pattern. It’s created by painting one wing of the butterfly, folding it together and opening it again to reveal a matching print.
By using black card stock as the art base, you can get a very similar look to a monarch or blue morph because they both have black wings with orange or blue sections on them.
To help kids get the look right, print out a photo of the real-life butterflies to look at first. Then making the pattern is easy.
How to do symmetrical butterfly painting
You will need:
- Black card stock (or an alternative colour of your choice)
- Cotton buds (Q-Tips)
- Acrylic paint in orange, yellow, blue and white
- Scissors
- The printable template – there is a small and large butterfly shape to choose from
How to:
Fold the template in half
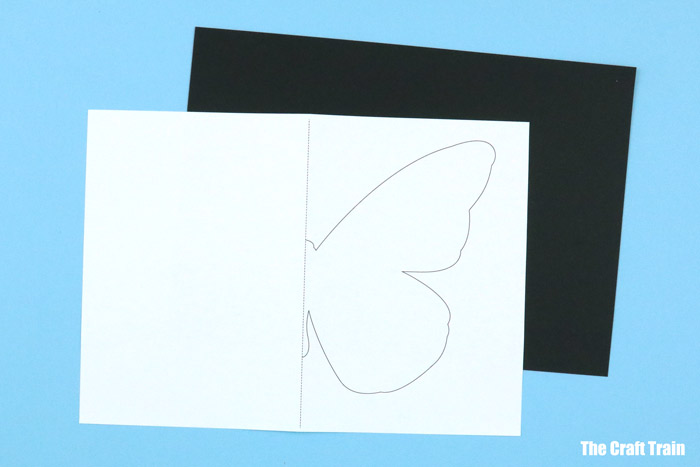
Fold a sheet of black card stock in half and place it inside the folded butterfly shape.
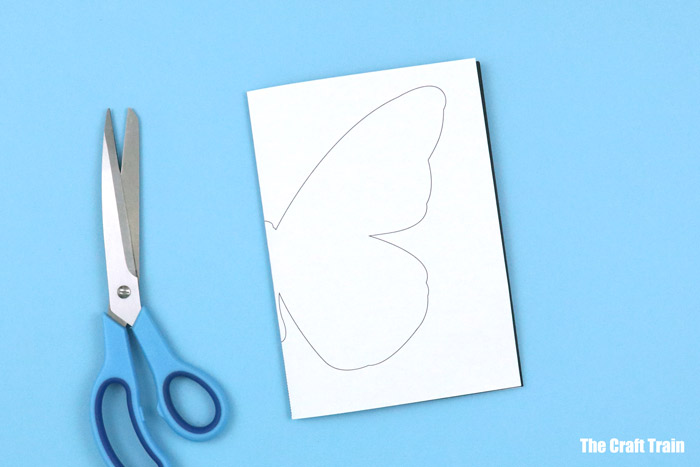
Holding the two sheets together, cut around the template shape. If you’re working with younger kids it might be easier to staple the sheets together first before cutting out to stop them from separating in the process.
Unfold to reveal a butterfly shape.

Use a cotton bud to place paint on thickly in sections, similar to the way they appear on a butterfly’s wing. Dot some white around the edges.
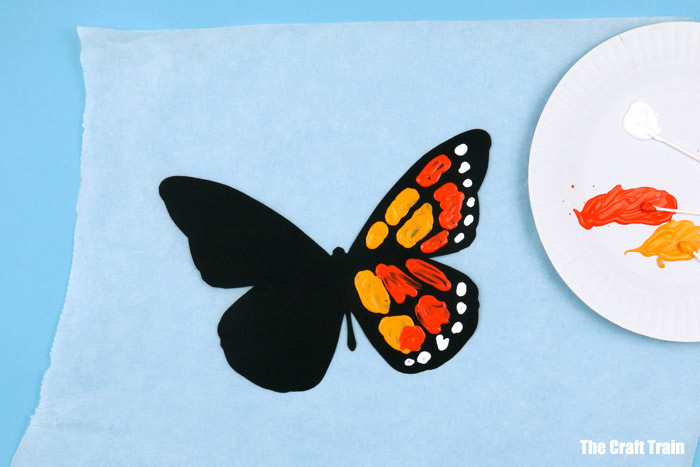
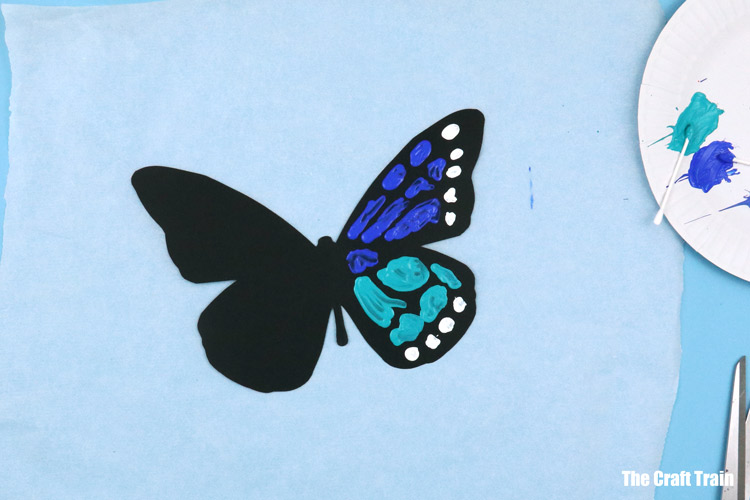
Fold the butterfly together, press down to create the print, and then carefully open the shape once more.
Your butterfly artwork is done!
More butterfly art and craft projects
- Make some yarn woven butterflies with a craft stick frame
- These glitter peg butterflies are so pretty!
- Use sponges to create beautiful butterfly prints
- Here is a sequinned sponge butterfly craft

What a great idea for not only children but adults as well. Thank you for sharing.
It would be ideal for children in hospital as they could engage making these beautiful butterflies, and taking their mind of being sick.
That is a beautiful idea, thank you for your comment
Love this idea!
What is the black surface you are using for this craft?
Thanks! These look fun to make 🦋
black card stock paper
I think black sulphite paper (which is higher-quality construction paper) would work just as well. We’ll try these as an art camp project this month!
Great project!
My son and I will make these today as part of our ‘home-made’ monarch life cycle. Thank you for the easy instructions!
My Granddaughters loved the butterfly painting project. It was easy enough for my 4 year old who is just really showing more interest in crafts and gave my 7 year old a challenge to use different colors to see how it would look. Thank you for your craft ideas!!
Thanks so much Cheri, I’m glad your grandaughters had fun with it.
I tried this and did as you suggested – put paint on thickly but it doesn’t look smooth like yours – looks like fingerprints – almost like veins. Any suggestions?
This is such a fun idea!
I’m a children’s librarian and I’m going to be using this as a fun craft for the kiddos! Thank you for this <3
Thanks Rae, I’m so glad you like it 🙂