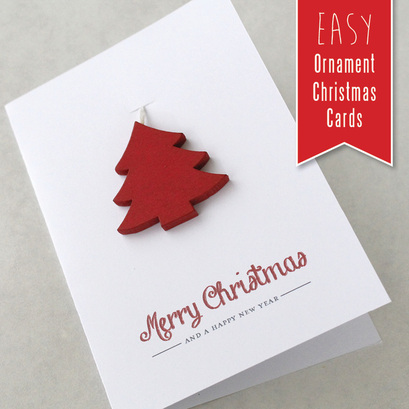
I love cards in general and home made cards are the best! Some years even though I love them I just don’t have the time to sit down, create, stick, fold and assemble cards for everybody. As a busy Mum I’m always looking for ways to make home-made quicker and easier but still just as effective, and this card ticks all those boxes for me. I also like that you can detach and keep the ornament as a tree decoration for next year and it’s not just going straight to landfill or the recycling factory. Here’s how you can make these quick and easy home made cards too…
You will need
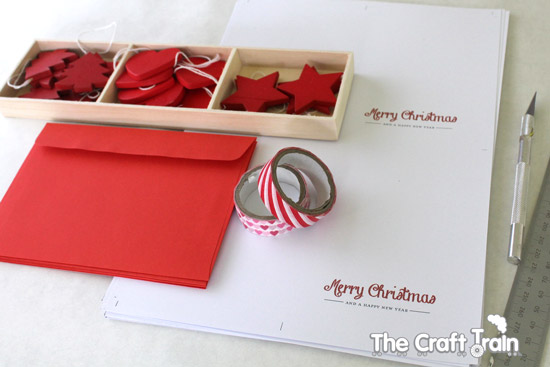
• White card stock that will fit through your printer, mine is 200gsm
• Small wooden tree ornaments – I bought this set of 16 for $3.99 at the discount store
• Envelopes to match your ornaments
• Washi tape
• Craft knife, blunt knife for scoring and a metal ruler and cutting mat
• Small wooden tree ornaments – I bought this set of 16 for $3.99 at the discount store
• Envelopes to match your ornaments
• Washi tape
• Craft knife, blunt knife for scoring and a metal ruler and cutting mat
How to:
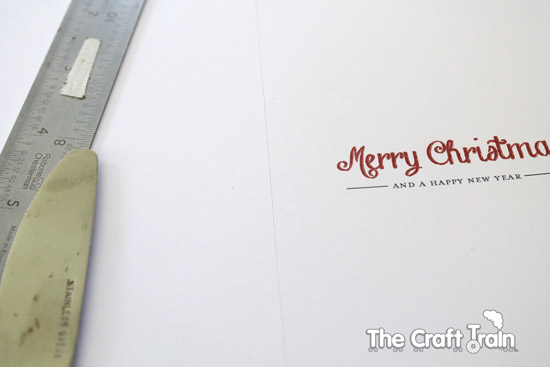
Print out a copy of the free printable card at the bottom of this page (note that the picture at the top has 2up on an A4 page but the printable attached has only one on the page). Before you cut out the card score the fold line (verticle centre) by running a blunt knife along a metal ruler and creating an indentation so that it will fold much better. Then cut the card out with your cutting knife and mat or just use scissors if you don’t have one of those.
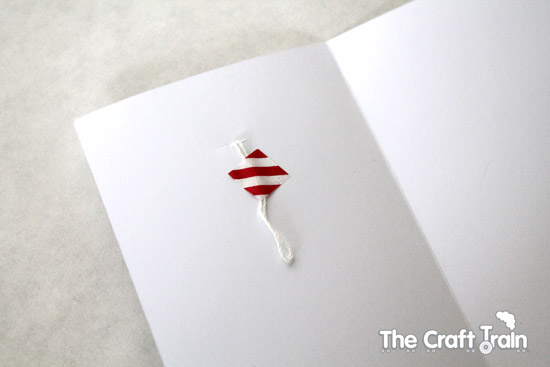
There is a small mark on the top front centre of each card to show where to cut a slit for the ornament string. Make a small slice over it with your knife, thread the ornament string through the slit and then stick down with a small piece of washi tape.
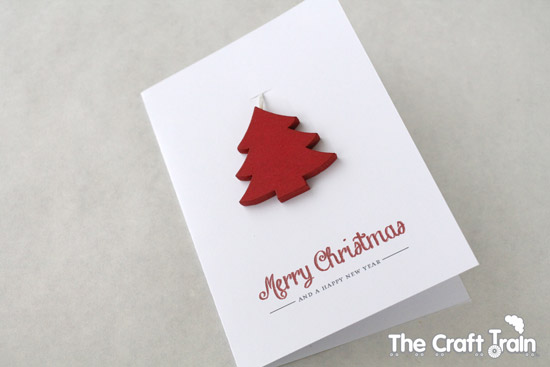
All done! Now all you need to do is write in them.
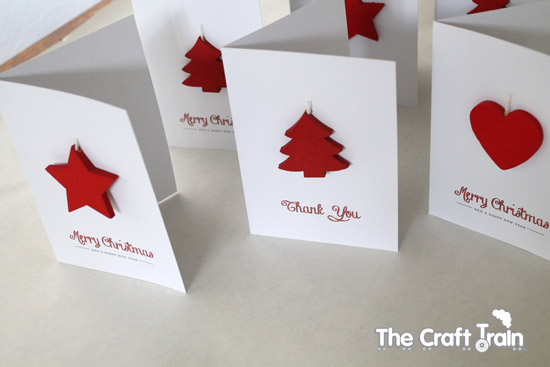
I also made some thank you cards in this style for the girls pre school teachers, you can see one front centre in this picture.
P.S. Sorry Mum to be spoiling the surprise, but I’m sure you’ll love your card when you get it in the mail anyway!
P.S. Sorry Mum to be spoiling the surprise, but I’m sure you’ll love your card when you get it in the mail anyway!
PDF Template
Download your Christmas card template here

Leave a Reply