Before I begin this post let me tell you that my kids are adorable, that I love them with every inch of my being, that I take great pride with every new achievement they have and that I thank the Lord every single day of my life that I have them to call my own. All this is true, but it’s been a LONG summer holidays. The mess in our house has been immense and never-ending. We went nowhere exciting over the whole summer, apart from the odd excursion into the city, the cinema, the shops and the park. If you are a parent you will probably understand that I am quite pleased that school is going back this week – which brings me to my latest post: a polymer clay school bag tag.
Polymer clay is a bit of a luxury crafting material, in Australia it costs around $5 for a small square of one colour – but it is very cool! It’s like a grown-up version of play-dough. For this project we used ‘Fimo’ brand, but there are others available. We have dabbled in polymer clay before, this was the second time I have used this craft material with my kids. They love it too, and it’s pretty exciting for them that whatever you make can be baked in the oven to become hard and permanent (unlike play dough!).
The school my kids go to – the local area public school – has an optional school backpack. Last year I took them to the shops and let them choose whatever bag they wanted (which happened to be a hot pink Barbie bag). They both chose the exact same bag and I found it very confusing (absent-minded mother that I am) to pack the correct lunch in the correct bag – yep, their taste buds are as different as their personalities. Once I even dropped the wrong bag at the wrong school and felt dreadful!
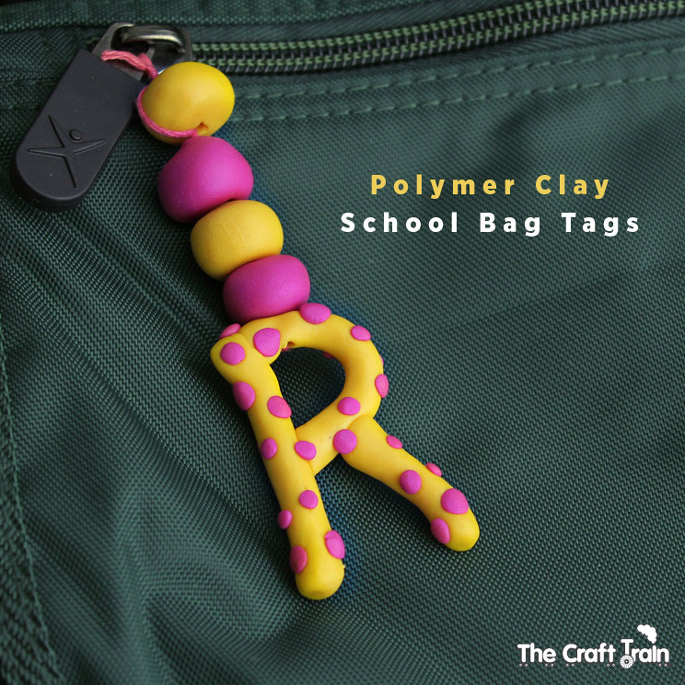
This year I’ve decided to go with the school backpacks. You can imagine with lots of kids in the same class having the same school bags that it might get a little bit confusing for the kids. Putting your child’s name in plain English on the front of their bag is not the best idea either – at least not in this day and age of stranger-danger paranoia that we parents are subjected to so often via the media. This polymer clay bag tag is a personalised way of allowing your child to have their bag easily-identifiable without giving their name away. Plus it looks pretty cool (at least we think so!).
To make this you will need:
– Polymer clay in at least two colours
– a blunt knife, clay tools, or palette knives
– a biscuit tray and an oven
– Embroidery floss or similar to tie it all together
How to:
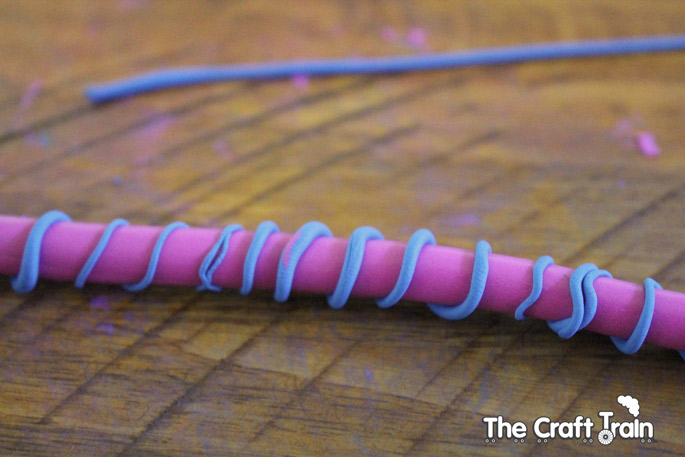
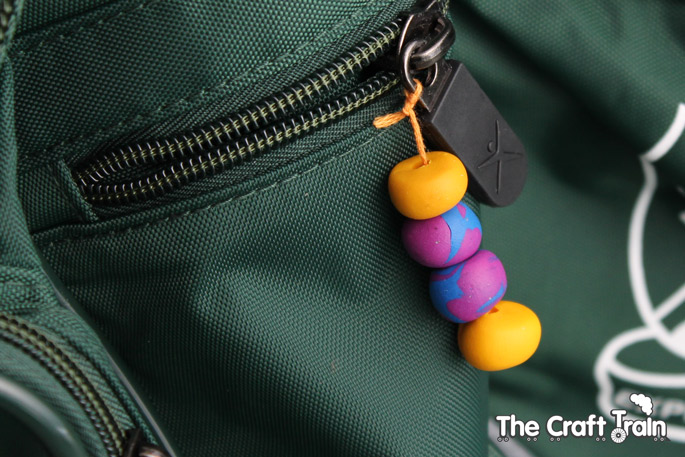
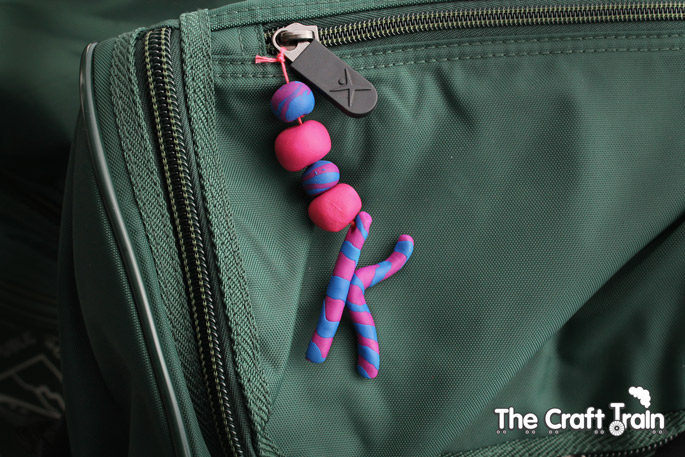
Did you always like play dough as a kid? If you did you will LOVE polymer clay. It’s quite stiff at first, but start by breaking a small piece off the square block of colour and roll it in your hands to get it soft and supple. The clay needs to be warm and soft to be able to be manipulated into different shapes. To make a stripy piece of clay I rolled a piece of one colour very, very thin, and another piece of a different colour far thicker and wound the thin piece around the thicker piece and then rolled it all into a flat roll (if that makes sense!). It is very easy and you can experiment a whole lot with this technique.
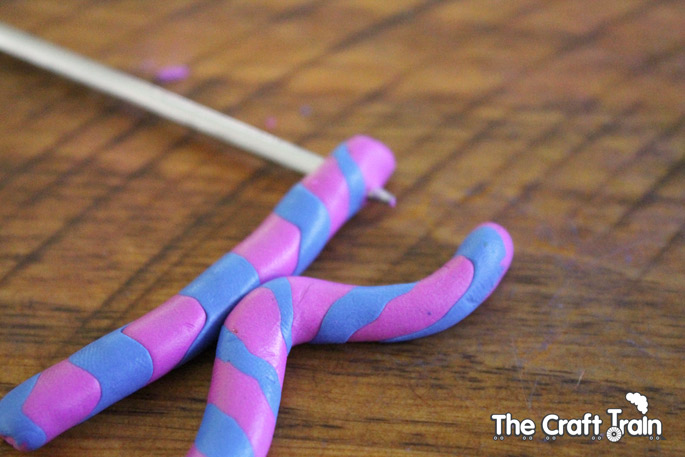
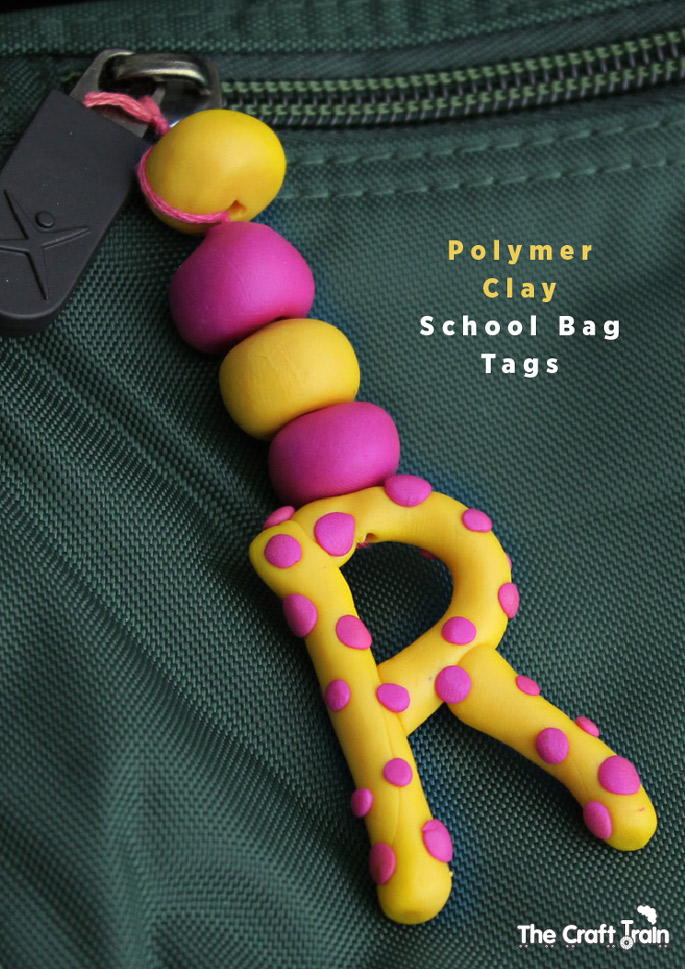
Bend the long-rolled piece of clay into the shape of the letter that your child’s name begins with and then poke a hole in the top of the letter with a kitchen skewer.
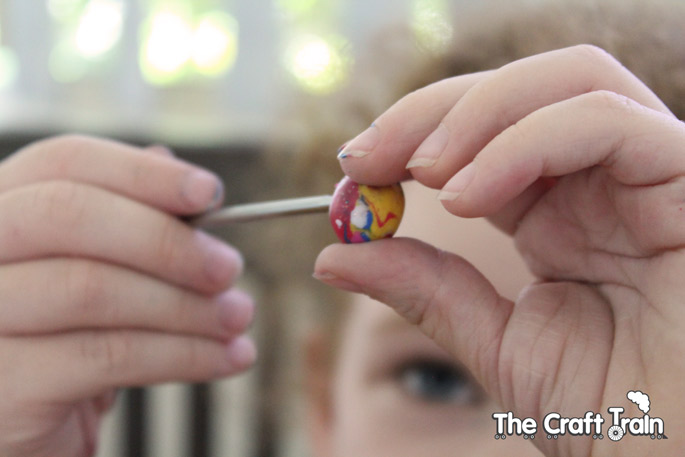
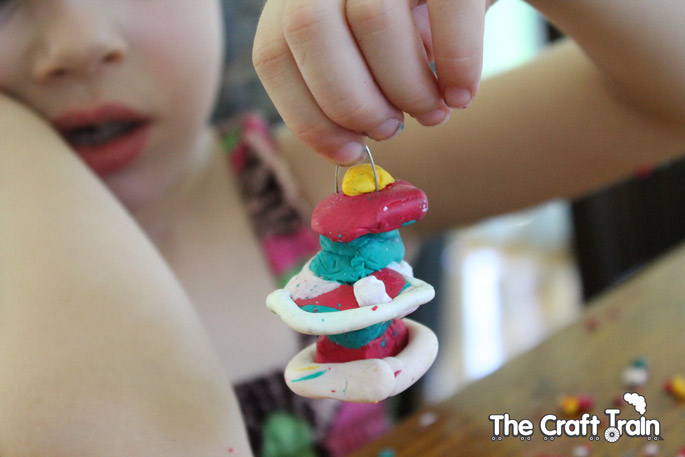
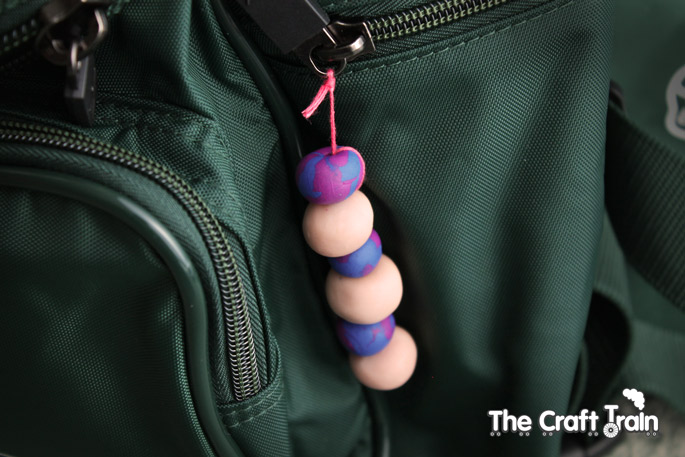
Then you need to make some beads. The kids can help making the beads by rolling different colours together and poking a hole in the centre with a kitchen skewer. The picture below is my 6-year old Miss R poking a hole in a bead she made. I can’t help but notice her very wrinkly palms in this picture – this is a bit of a family gene (my own hands look so wrinkly that you would think I was 60 instead of 36 – this is the reason I don’t include my own hands in pictures very often) but I like to dismiss this as us having ‘old souls’ (you never know, right?).
Miss K made some gorgeous pieces too. Last time I used this material with my kids I needed to get the clay soft and mouldable for them, but this time (aged 5 & 6) they were both able to roll and soften the clay themselves.

Miss K made a fairy ornament…
Miss R made lots of coloured balls, beads and hearts. The mermaid you can see was made by me and snapped up by Miss K as a new favourite toy as soon as it came out of the oven.

Once you have baked your clay according to the packet instructions you can string it onto a piece of embroidery floss, thick cotton, kitchen string or fishing line. Tie it onto a zipper and you’re done!
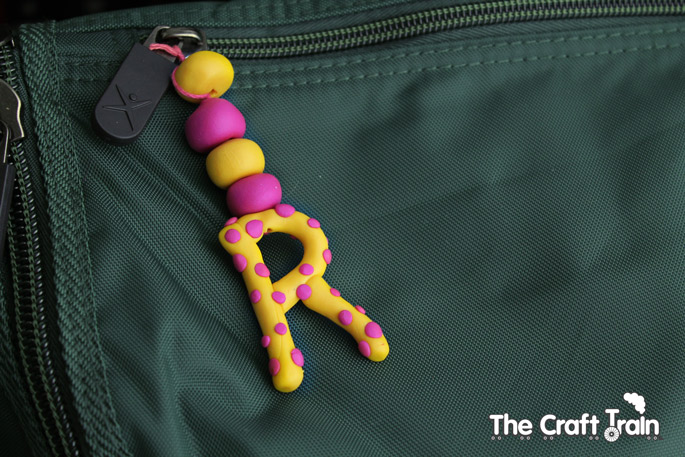
The girls love their bag tags, and I love that I won’t be getting their lunches mixed up and sending their bags to the wrong classrooms. Want to make some? Go on, why not!
Do you follow us on Pinterest? One of my favourite boards is craft and play. On it I collect many ideas that are crafty and also provide a fun play experience for the kids.
An Exciting New Ebook
Happy Handmade is a colourful collection of craft ideas for kids by some of the best ‘mom’ craft bloggers on the net. Check it out here![]()

Leave a Reply