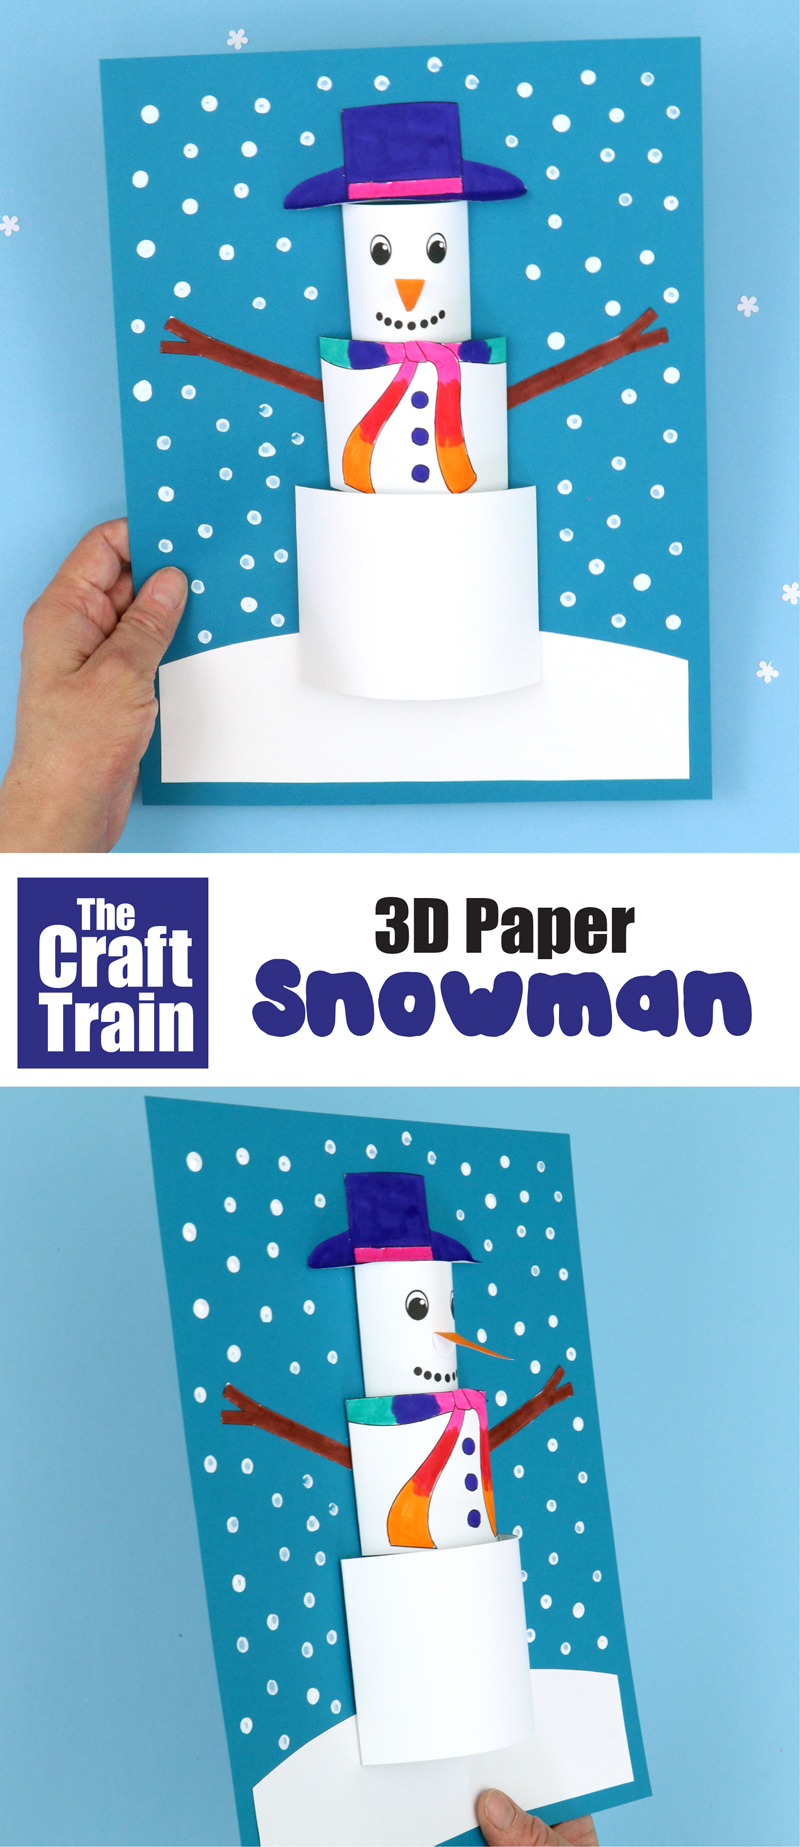
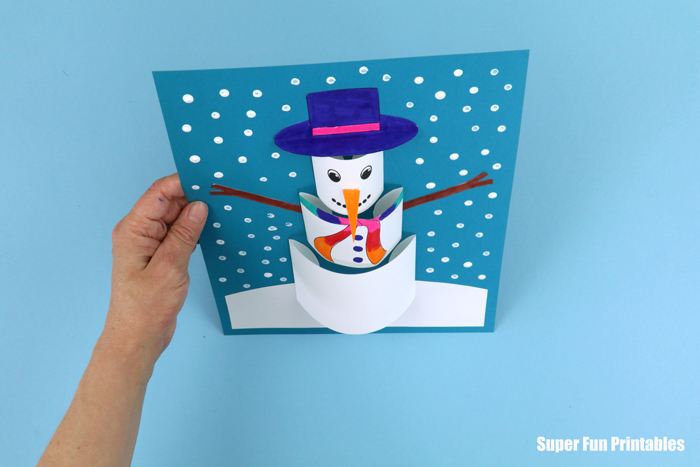
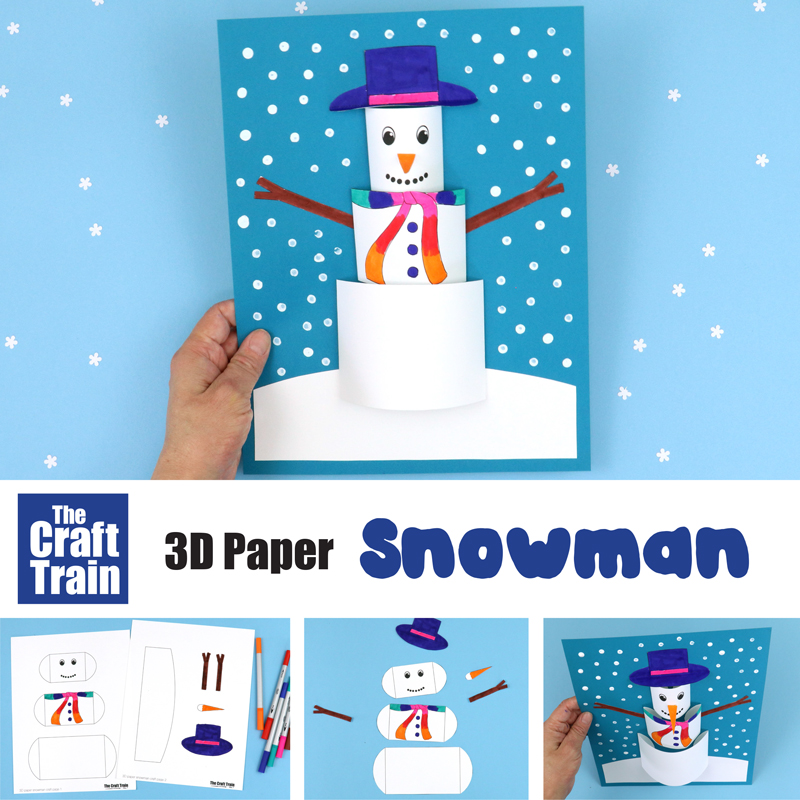
Make a 3D paper snowman with our latest printable template. This is an eye-catching Winter craft for kids that looks great hanging on the wall.
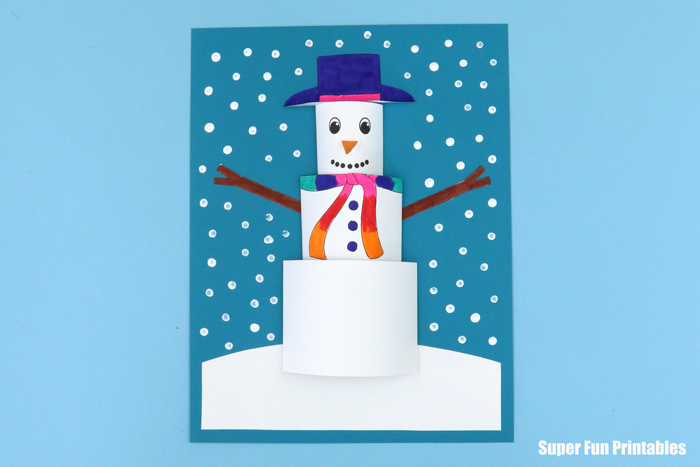
The snowman sits on a hill surrounded by falling snow and, with his body parts glued on with a raised curve, he has a fun 3D effect.
I love a good snowman craft. I wanted to create a 3D image of one, because I like the effect of artwork that ‘leaps off the page’ so to speak. Although, I know snowmen can’t leap!
This craft really is very easy, I’ve listed it for ages 6 and up because of the fine motor skills involved, but younger kids who are crafty types might be able to do it too.
I first tried making this craft using ordinary thin white paper from our printer, and it did work but once you colour the pieces in with felt tips the paper gets thinner and more floppy. It would be easy to tear the hat while folding and gluing. It also has a not-quite-opaque look about it, if that makes any sense at all.
I tried it making it again on heavy paper and it worked much better, and the snowman looked more solid.
So if you only have ordinary paper at home, it will still work, but light card stock or heavy paper works better.
How to make a 3D paper snowman craft
You will need:
- Card stock in blue for your background
- white paper – heavy paper or light card stock works best for this craft
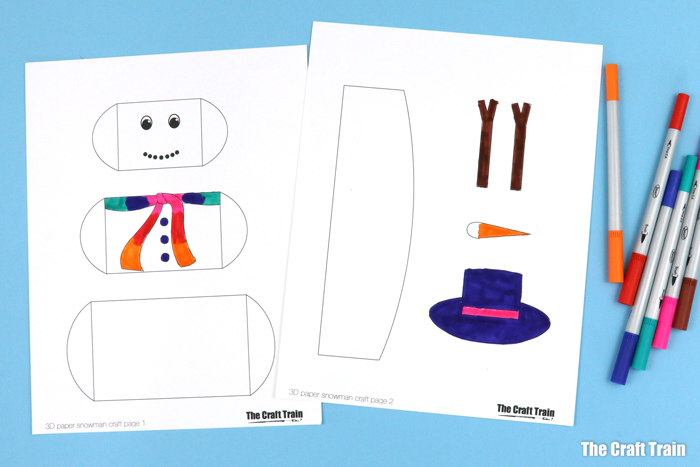
- Felt tip markers, pencils or crayons
- Glue stick
- Scissors
- White paint (we’ve used acrylic)
- Cotton bud (Q-tip)
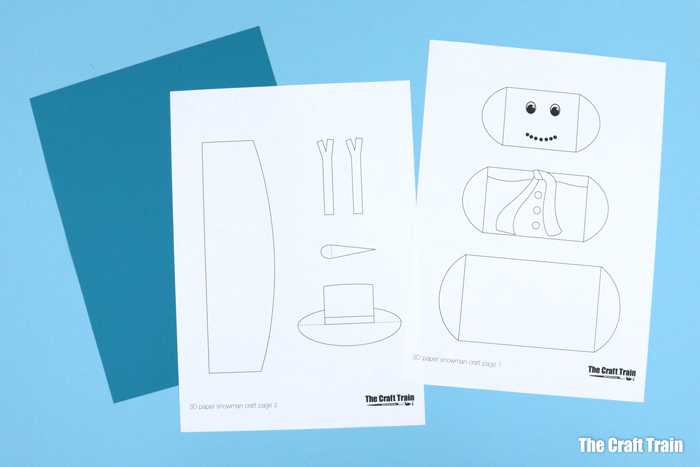
- The printable template
How to:
- Print the template out
- Colour the parts that aren’t made of snow in, including the hat, scarf, buttons, stick arms and carrot nose
- Cut the shapes out.
- Glue the ground on first, leaving a small gap around the edges for a frame
- Fold the glue tabs down on each tier of the snowman, and glue them on so that they have a raised curve. Glue the biggest piece at the base, overlapping the snowy ground and then above it the scarf and buttons.
- Fold the glue tab on the carrot nose and glue it onto the face before gluing that into place.
- Fold the brim of the hat along the fold line, then place glue on the top part and glue it above the head so that the brim pokes up at a 90º angle
- Glue on the arms
- Use a Q-tip or cotton bud to dot falling snow all around the snowman
Told you it was easy!
You might also like
- Make a snowman winter scene with fingerprint snow
- Here is a 3d Arctic fox papercraft
- We also have a 3D polar bear paper craft
- Make a mother and baby polar bear using our printable template


We myself with my grandchildren made your tp roll snowmen ornaments this year. We made Papa, Mama, Baby and our cat Shellshock with your inspiration. We also made handprint reindeer cards. The kids loved both these activities because they were simple and doable for their age. I mostly glued the googly eyes on because we used super glue and I had to braid the sparkly pipe cleaners for scarves because they wanted all the colours. They even wanted a tag for the cat! Now all 4 are on their Christmas tree.
Many thanks!
It sounds like you’ve been having lots of crafty fun!
Suuuper.. : )