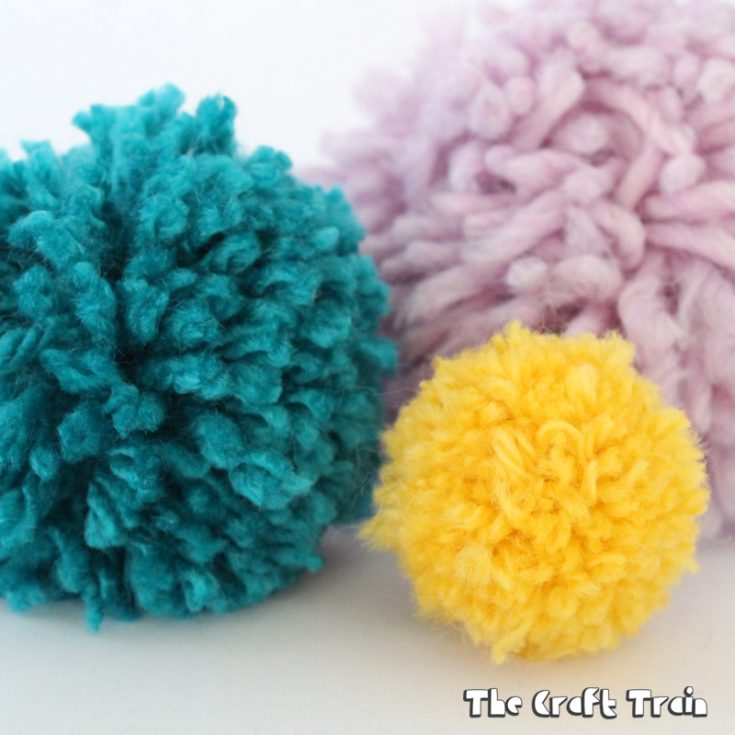
Here is an easy DIY pom pom maker you can create from a scrap of cardboard.
This pom pom maker craft was first published in 2016 and has been updated and reshared for today’s audience.
I really hate to admit this but as a craft blogger I struggled for a long time to make a decent pom pom. In the olden days when I was a child we used cardboard discs shaped like a donut and you would spend a very, very long time carefully wrapping yarn around and through the hole in the centre until it was plump and ready to trim.
In this day and age we’re all a bit less patient and that technique seems very cumbersome and tedious (I’m sure I don’t just speak for myself here).
After a some experimenting I’ve come up with a much quicker and easier way of creating big, fluffy pom poms. I already own several plastic pom pom makers purchased inexpensively from the craft store and although I’ve given it a good shot I haven’t been able to figure them out. Quite possibly I’m a big dunce when it comes to following instructions but this way has been FAR quicker and easier for me. Let me show you how it works.
How to make a DIY cardboard Pom Pom maker
You will Need:
- Scrap cardboard – the thicker and stronger the better
- Yarn – I’ve found the very thick (affiliate link) chunky yarn works great for the large-sized pom poms and the finer yarn (affiliate link) works best for the small size but there are no real rules here
- Scissors – sharp scissors are a must for cutting and trimming
- pom pom maker template
How To:
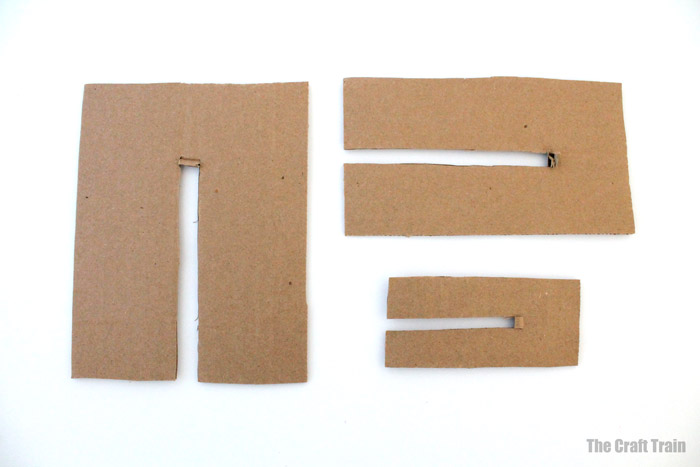
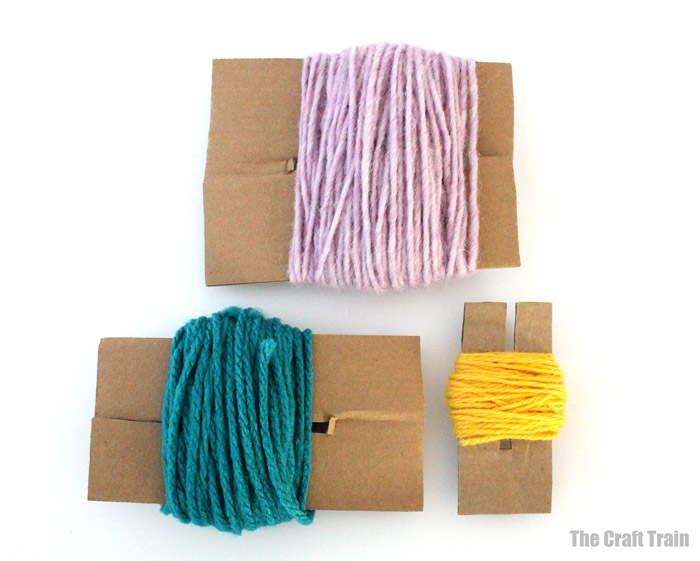
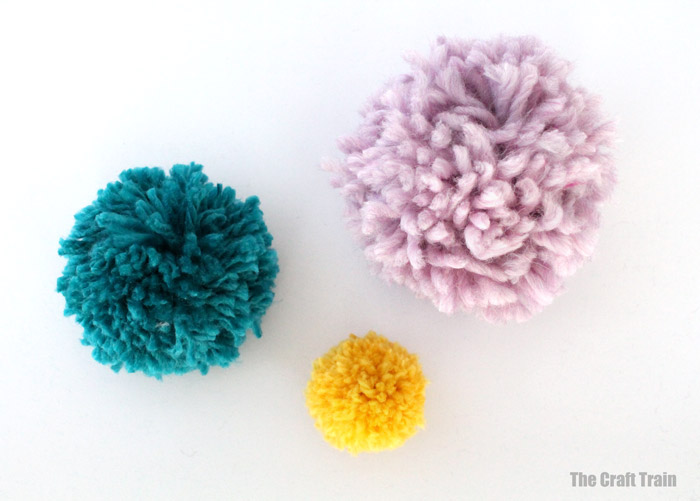
Cut out a shape that resembles a rectangle with a slit running down the middle but not all the way, like in the image below. You can see I’ve made three different sizes.
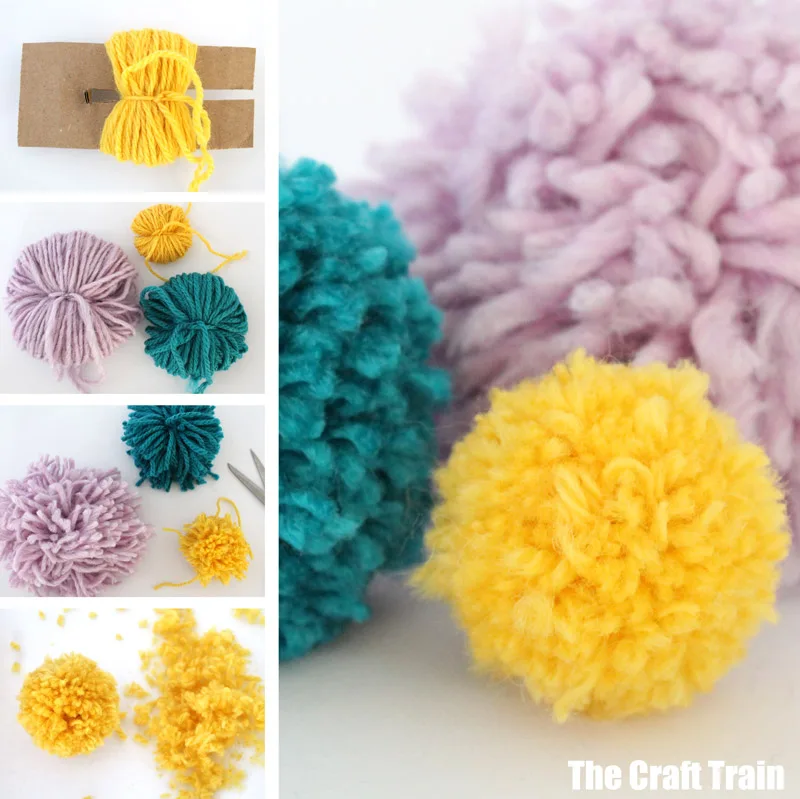
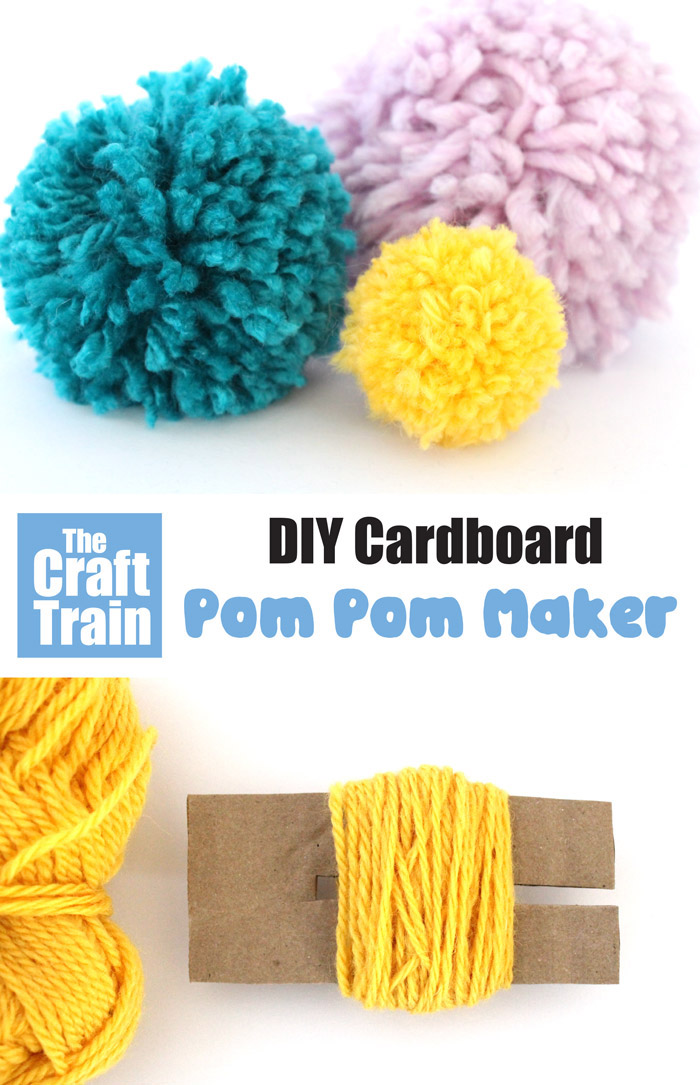
Wrap these in yarn. The yellow yarn in the image directly below is 8 ply, the other two are thicker.
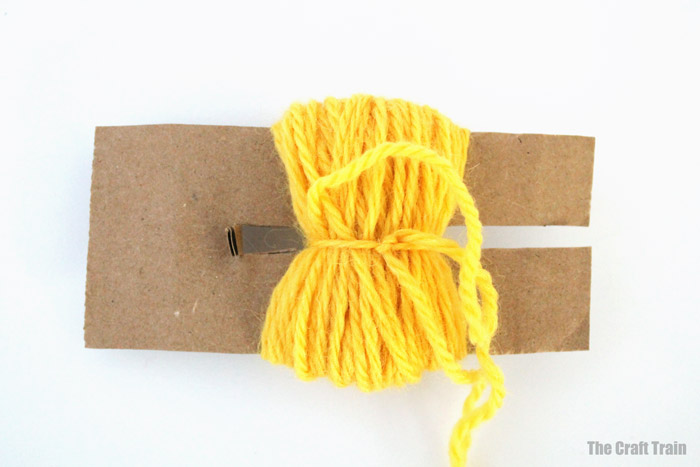
While the yarn is wrapped around your cardboard pom pom maker tie it tightly in the middle.
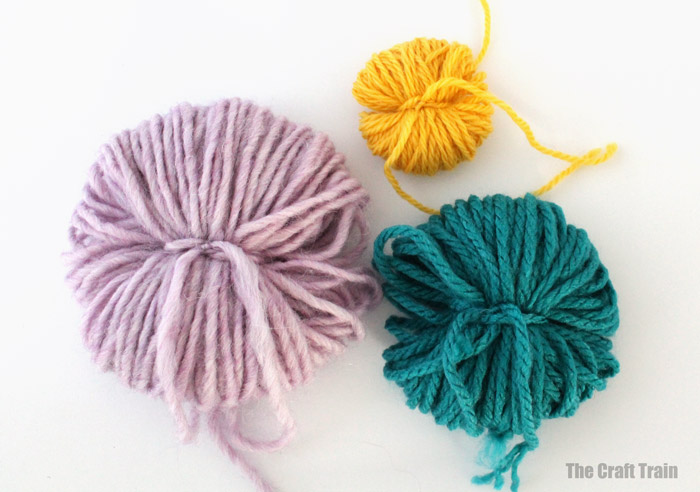
Slide it off the end, turn it over and tie even tighter on the opposite side.
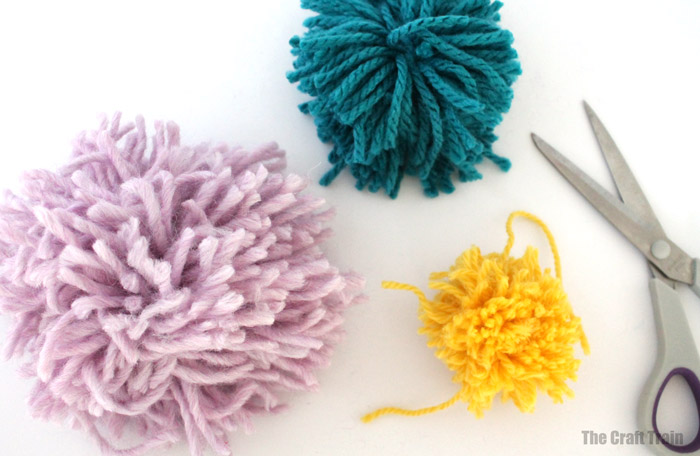
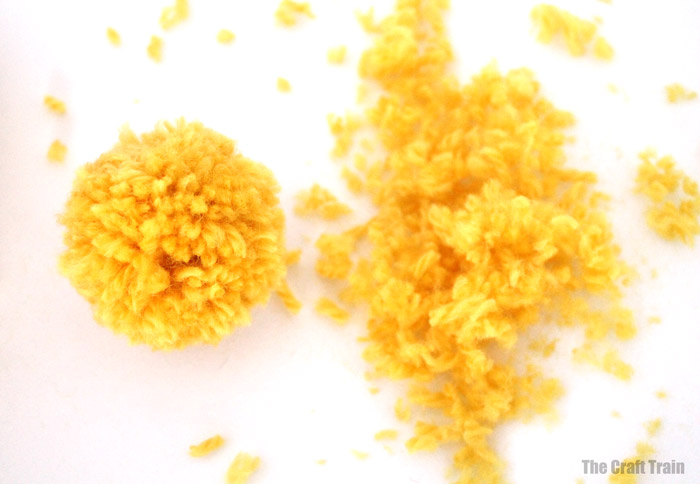
Use your sharp scissors to cut the looped ends. It will come out looking very shaggy and a bit uneven.
Now it just needs a good trim which is the big secret of making a fluffy, round pom pom.
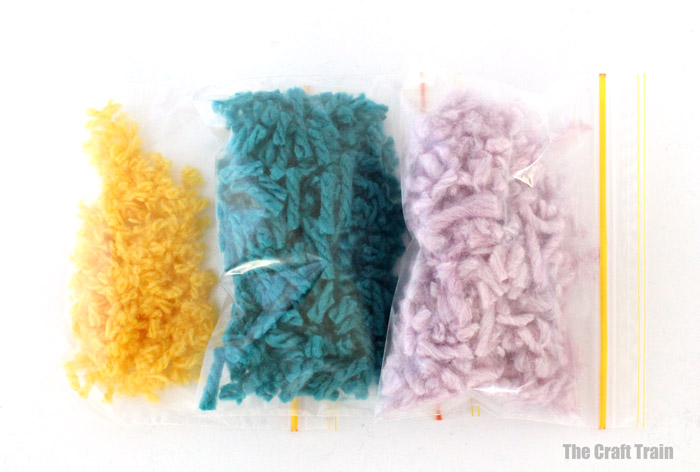
Instead of throwing out your pom pom trimmings store them in a plastic baggie and keep for future craft projects. They can be used in art collages or anything else you can imagine up, like these fluffy yarn pet rocks.
The best thing about this technique is that is SO quick you can churn pom poms out in no time at all – no more cumbersome round disc. My kids struggle with the part where a knot needs to be tied very tightly (that is the trickiest thing about this craft), so when they make pom poms they need help in that area but that is all, it really is very, very easy!
You can use our DIY pom pom maker to make a pom pom hedgehog or a pom pom panda
DIY cardboard pom pom maker
Make soft, fluffy pom poms using this DIY cardboard pom pom maker
Materials
- scrap cardboard
- yarn
- printable template
Tools
- sharp scissors
Instructions
- Cut out the template size for the pom pom you wish to use, trace the shape onto cardboard and cut it out. The template is delivered to you via email for free when you enter your details in the space provided.
- Wrap yarn around the side of the template that has a gap in the middle until you have a plump lump of it
- While the yarn is wrapped around your pom pom maker tie it tightly in the middle
- Slide it off the end, turn it over and tie it tightly on the opposite side
- Cut the looped ends of the yarn using sharp scissors
- You now have an untidy looking pom pom, hold it over a piece of paper and trim the shaggy parts so it is nice and round-looking. The paper catches the trimmings for an easier clean up
More fun crafts to make from yarn:
- Make a gorgeous set of braided yarn dolls – so fun and easy!
- These pretty yarn butterflies are made with a simple weaving technique
- Kids will love re-visiting the classic God’s Eye weaving project
- Have you ever tried finger knitting? It’s so fun and easy!
- Here are over 15 cool yarn crafts kids will love

Small Cable ties are really good for going round the middle of the pompom. You can pull it REALLY tight and even quite small kids can manage to thread them.. it’s quicker too.
Sounds like a great idea, thanks for the tip!
What size do I cut the cardboard
However size that you want the pom poms to be
That’s what I’m not sure of like a size of an orange
Ann, I’d make it a bit larger than an orange in that case because when you trim it it will become smaller than the height of your pom pom maker
Your templates are about 4 inches, 3 inches and 1 1/2 inches – is that about the size of the pom poms you will end up with? I, too, am interested in knowing how to decide what size pompom I will end up with before I start the process!
The pom poms will end up a bit smaller than the templates, because you need to trim them. Sorry for the late reply, I’ve only just discovered this comment now
Do you what are the sizes of the cardboards for the yarn to be wrapped on.
Hi, there’s a template you can use to get the exact size (in the you will need list)
Thank you doing this. I am a terrible pom pom maker! I mean really bad. I can’t wait to use your templates!
Happy pom pom making!
When my pom poms r made how do I make a rug
I’ve never made a pom pom rug myself, but you will be able to find plenty of tutorials on Pinterest
What are you using you Pom Pom trimmings for??? I have two bags full! 🙂
Oh, don’t throw them away! I have lots too and have plans for them. I was planning to post a pom pom trimmings craft before Christmas but then the Christmas crafting rush and holiday time got in the way. You could use them to collage in art or as stuffing in felt softies. I do have a craft designed but not yet photographed and posted that uses the trimmings but I can’t give it away just yet.
I can’t throw anything away, my closet floor is proof. I use Pom Pom scraps for stuffing small items like snowmen hats or sloppy beards, even to roll diy Easter Eggs in. Unless it Molds or Smells Never Throw it Away!
I made a pom pom maker for each of my girls. They loved doing it and couldn’t believe how quick it was to make so many in a short amount of time. They did struggle with tying the knots though. They are wanting to make a pom pom rug for their room. My oldest daughter plans on making a pom pom mini rug for her school locker. Thanks for sharing this post!
That’s great! Knots can be very tricky for kids, and on pom poms they need to be tied very tight.
How many times do you wrap the yarn around templet
There is no real right or wrong, if you wrap them around more times the pom pom will be thicker, less times and it will be thinner. Experiment and see what works for you.
Thanks so much I remember my grandmother Merredith creating pom poms when I was a child but she never showed me how to make them. Now I can teach my grand kids they are going to love
it!
Fabulous! I hope you guys enjoy making them
Wow I found this so helpful!
About how many times did you wrap on the medium size cardboard? Thank you Mary Jane
I didn’t count the number of times to wrap plus that would depend on how thick your yarn is. I think just until it’s about as puffy as I’ve got it in the picture.
If I am making a rug what do you use for the backing and where do you get it.
Hi Donna, I’ve never made a Pom Pom rug before so I can’t tell you. Your best bet is to search Pom Pom rug on Pinterest to try and find a good tutorial from somebody who knows how to make one
Fabulous! I remember the donut pom-pom makers, they were a bit of a challenge.
I remember them too! So time consuming but so rewarding to get that fluffy pom pom at the end 🙂
Thanks for this. So much quicker than traditional method with cardboard circles.
I love this. This is by far, the easiest way to make pom poms out there! I linked my pom pom garland post to this. Happy holidays and keep crafting!!!
Are the pieces of the pom pom supposed to be easy to come out? Cause when I made mine even though it was tight I was able to pull yarn out.
Hmm, I think this would be the case with any pom pom (except maybe factory made)
Hi: I can not believe I saw this post on my Pinterest feed. I have been making pom poms for the past 4 months with my daughter with the store bought Pom Pom makers. Just this week I was trying to remember how my Grandmother taught me how to make pom poms about 40 years ago. It just came to me this week that she used cardboard with the slit. I love the movie, You have brought back such fun memories. I have a cute Pompom Valentines wreath on my blog I would love for you to see it. I also have been trying to get up the courage to make a movie or two and you have inspired me yours is so good. If you would not mine what camera did you make the movie with. Thank you again for the memories. Susan @craftingafamily.com
Thanks Susan! Pom poms are so much fun to make I agree. For my videos I use an iphone, and occasionally my DSLR although still learning to use that for video
Pinned the post and followed on Instagram.
How much yarn did you use?
I didn’t measure the amount of yarn, just a nice fat squishy pile of it 🙂
My mother taught me how to make pompoms with the cardboard circles about 50 years ago, and I curse everytime I have to cut out the middle of the cardboard! Ans, wrap in and out! I can’t believe I never thought of this or saw this before! It’s brilliant!!!
Thanks Francine, I love this technique too – so much quicker than the cardboard circles way!!
Thank you for your templets. I am going to give it a try. Hope my pom pom turn out just as nice as yours. I have plans to make a pom pom rug.
Sounds awesome! You’re welcome for the templates 🙂
I love this! I made a template for a 4” diameter Pom Pom & it came out perfectly. I was using the cardboard circle before, but it took so long & was very frustrating. I can now make a beautiful pom pom in minutes. On a different post I saw a technique using a wire brush (for grooming a cat) for ‘fluffing’ up the yarn, turning a yarn pom pom into lovely, fluffy one that resembles faux fur, depending on the type of yarn. Thanks for sharing your ingenious idea & sample templates. Btw, I’ve also used your tool to make tulle pom poms, which is so much easier than using the cardboard circle. I’m having so much fun!
Oh wow, I’d love to see a picture of the tulle pom poms. Thanks for your comment 🙂
I use the pom pom makers all the time and don’t have a problem with them but they are to tricky for young kids to use. This will be so much easier for my preschool class to make their own pom poms. Thank you!
Hope they have fun making them 🙂
How would I wrap the yarn to make a multi colored pompom. ?
wrap more than one colour into the bundle
I’m 11. how easy would it be for me?
You should be fine! Cutting cardboard can be a bit tricky because it’s so thick, but use strong, sharp scissors to help. The other important thing is to tie the knots really tightly, and then turn it over and tie tighter again. My kids love to make pom poms
Kate, thank you for posting this information. I really like the yarn you’re using…particularly the colors – the lavender is quite nice. Are you at liberty to share your source? Thank you!
We bought all our yarn from Spotlight (an Australian craft supply store)
This is great & speedy post are always the best , I love PT& YT but oh my can they be so drawn out, thanks so much for the speedy & super helpful video 👏 , I’m working on a multi color (using your method & one very similar 2yours that I learned in HS they were called warm fuzzies:) & trying some little animal designs 🤞
Oh I love the name “warm fuzzies”, haha so cute
Hello I just discovered your blog on Pinterest and this is just about the easiest way I have ever seen to make a pom pom. I like it also because you can wrap different colors in rows on the same card board easily and come up with a multi colored puff. Lots of fun thanks for sharing.
Thank you for your positive feedback! I am so happy you like the technique – I agree, it’s so much easier
Hi! May I seek permission to print out the template and leave it on a table for students to have a go in our library? don’t want to breach any copyright or anything, is this allowed with permission from you?
That will be fine 🙂
thank you so much!
You’re welcome
Is there a specific technic that can be used so that I don’t have to trim much? My scissors are getting dull and I’m getting lazy..! 😂and my hand hurts A LOT. The making of the cardboard is actually a really good way for a pompom maker.. I’ve been looking around my room looking for a big-shaped fork.. but the cardboard thing was wayyy easierrrr. Thanks
If you want to make a pom pom without wasting yarn and needing to trim then I’d suggest buying a pom pom maker. They’re pretty cheap, but I haven’t mastered how to use them yet!
This is such a great way to make pom poms!! I’ve been struggling to make them with a cardboard C. I put them in a bag with catnip for a little while and then give them to my cats. Doing it this way will be so much easier and faster. Thanks!
I love making them this way too 🙂
This is a great technique. It looks easier then the circle disc we used to use. I wonder where all the pom poms have gone from our childhood crafting?
Great post for making pom poms to size. Another way is to put 6″ or so of yarn between your 3rd and 4th finger ends pointing toward your arm and wrap yarn from the skein around your 4 extended fingers to a plump size as you did. Then tie with the yarn that you put between your fingers. Once it’s off your hand you can tighten the knot and make another really tight know. Then trim as usual.
Thanks for the tip 🙂
I am trying to make my pomp look as round as possible but still it doesn’t, can I use a wire brush to fluff the pomp. its a good idea. Thanks for Sharing
The wire brush sounds like a great idea
Hi Kate,
Is it okay that I post this to the library’s teen instagram and give you credit?
That’s fine, thank you for asking 🙂
This is a great way for kids to make pompoms and your instructions are nice and easy.
You can use a cutlery fork if you dont want to make the cardboard template but the pompoms are small!
Thanks Josie 🙂
This is great! You can use pipe cleaners to tie around the yarn too and just twist – it makes for fun antennas or a hanging hook too and easy for kids! Loved the butterflies and dolls you made with yarn too! Thank you!
I’m glad you like them 🙂
I have cussed and cursed using cardboard circles for years!
This method is killer!
Thanks so much for posting it!
Really easy and awesome!
Stan.
x
😊😊😊
You’re welcome 🙂
Thanks for the template! I had a pack of old style pom pom makers which were not useful. I found a piece of cardboard and cut it as suggested. Very easy – the only thing was how to attach the pom pom to the scarf I was making. Turned out okay in the end. Thanks again!
Glad it worked for you 🙂
How can I make it multicoloured? I want to make a Robin.
Try it!
What a quick and affordable way to make pom poms! The only thing the instuctions are missing is if we tie around the middle whole wrapping of the yarn, or in the middle with the front of the yarn and through the middle of the hole (thinking of a donut, is it both sides of it while on the template, or just one side and through the hole). That clarity would be great for people who can’t load the video or don’t learn well that way.
Otherwise, the instructions were clear and I am excited to experiment with yarn and sizing!
Tie around the whole middle
I am absolutely thrilled that I came across your post on Pinterest. This is the best pom pom maker ever! I am 80 years old and in the process of knitting preemie and newborn beanies for charity. A little pom pom will really ‘top off’ the little caps. Thank you so much.
I’m glad you found the idea helpful, and I’m inspired that you’re knitting beanies for prems at age 80! That’s fantastic.
Just saw your site. 50 yrs ago made a catapillar using 6” poms strung together with 1/4” elastic and a 4” Pom for head for infant daughter as she got past chewing stage added tiny poms for eyes and nose and later antennae Grandchildren loved playing with them too. Using the elastic made them wiggly which they loved
Love this idea!