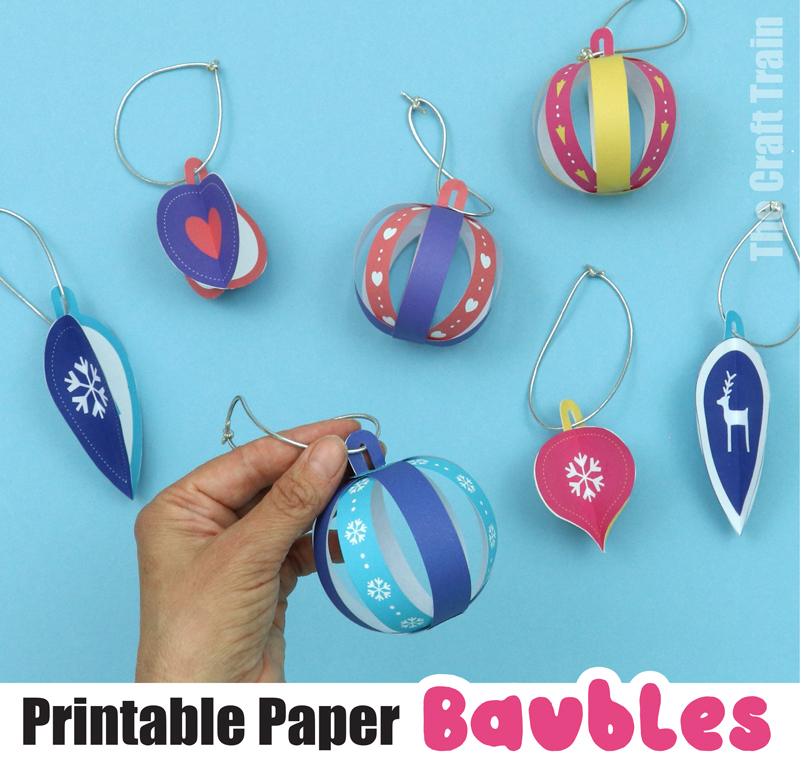
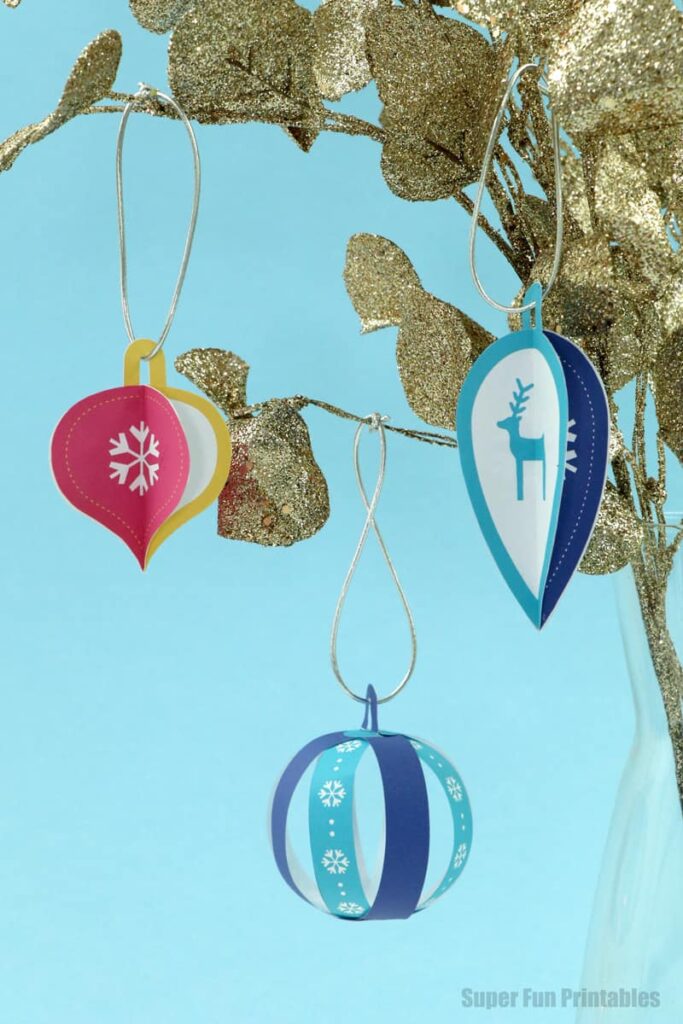
Check out these cute and colourful printable paper ornaments you can make for Christmas and the holiday season.
The ornaments are simple to cut out and glue together and come in seven different designs. This is a great craft for kids of all ages—adults too.
Christmas decorating is more fun with paper! Paper is easy to bend and fold, can be printed in fun, bright colours, and is cheap and biodegradable.
I love how these DIY paper ornaments turned out. I haven’t put our official tree up yet, but when we do this weekend these are going on it.
Also check out our printable Christmas paper craft collection — 12 Christmas decorations you can make from construction paper with printable templates.
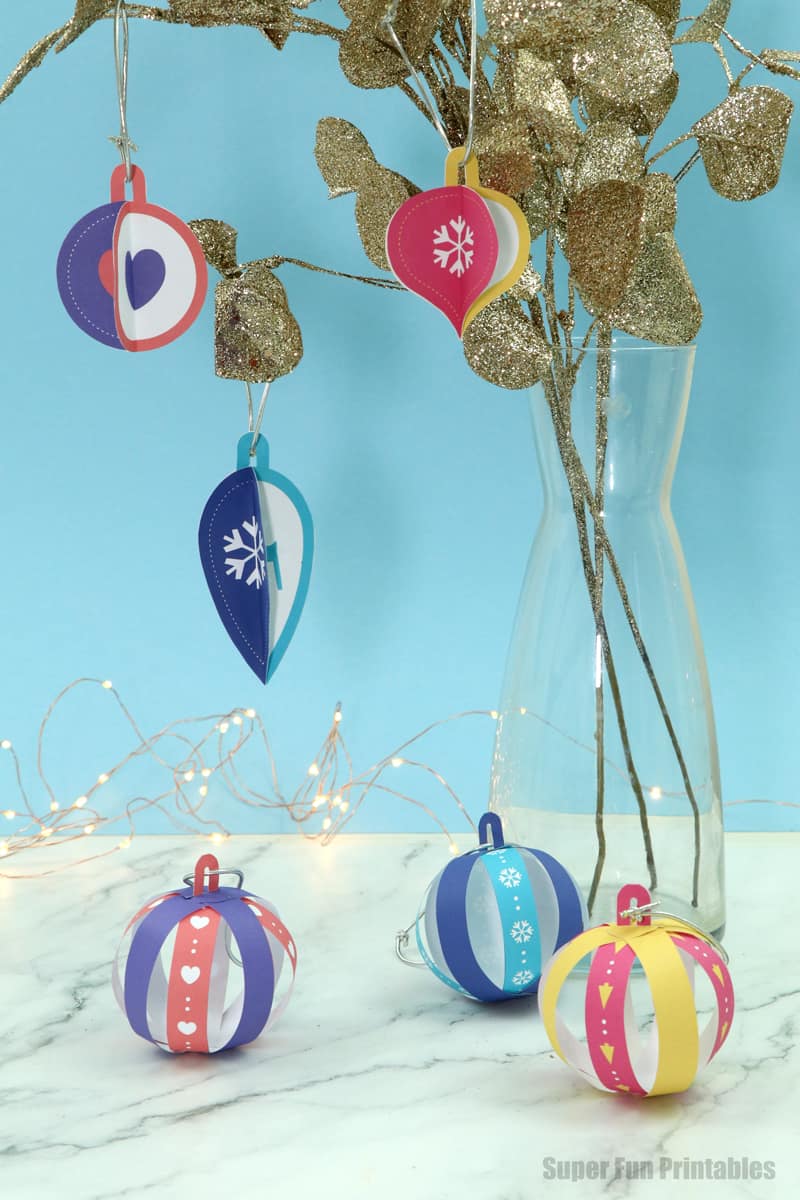
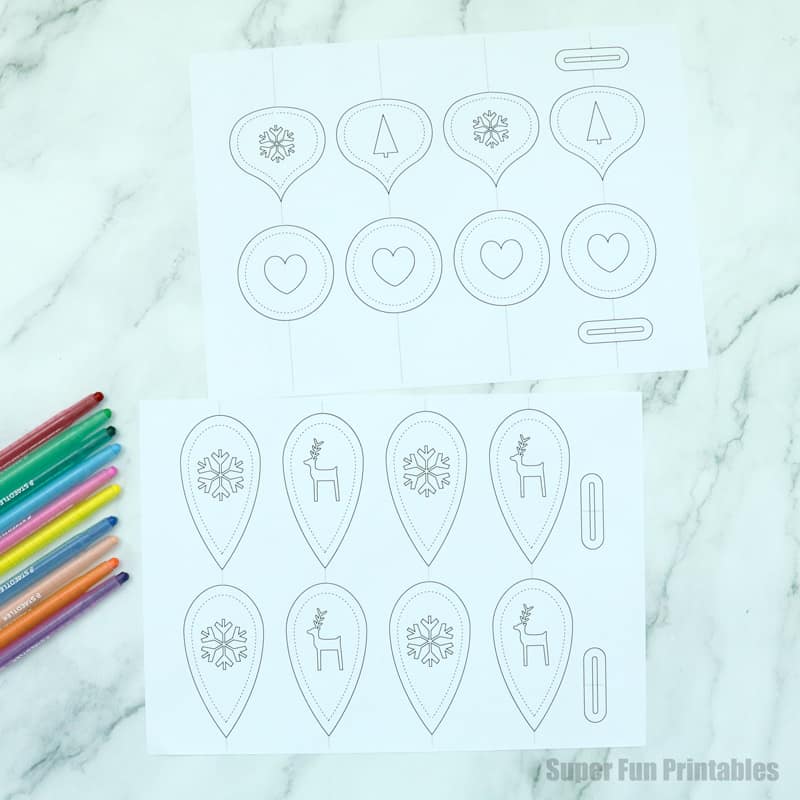
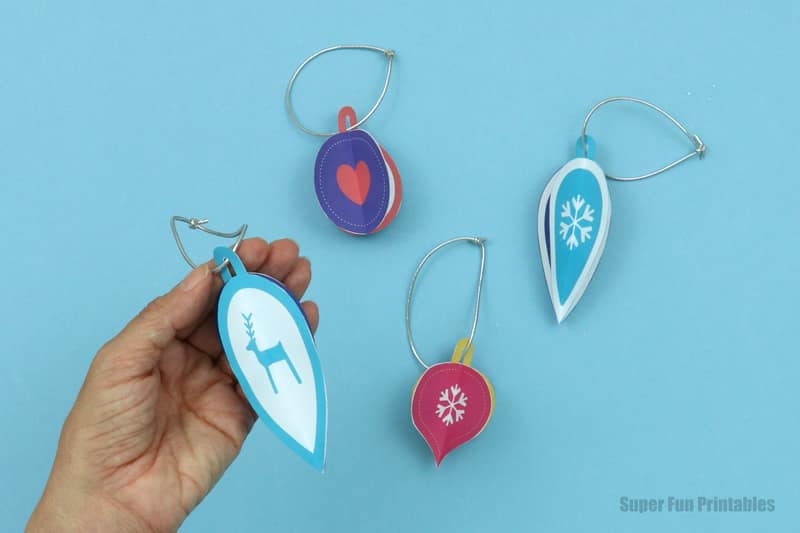
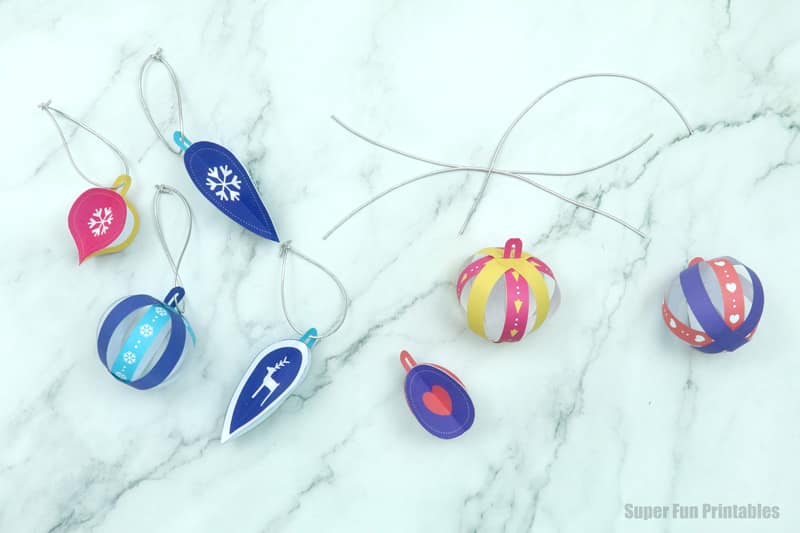
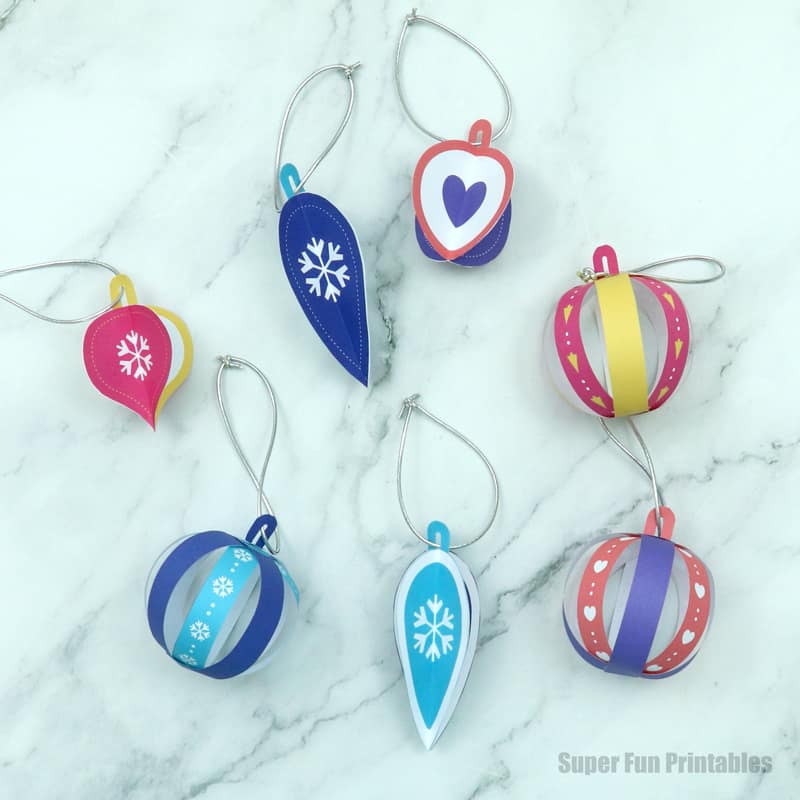
The paper ornaments come in four assorted shapes and seven designs overall—three strip bauble designs and four folded bauble designs.
The template also includes a black-and-white line art version so you can colour your own. This is also useful if you have a particular colour theme you want to stick to.
The strip baubles and folded baubles are both are very easy, but the loop to thread the string through for hanging is a little fiddly to cut out and glue on. For younger kids, an adult might need to help with this step. Alternatively, you can make the baubles without the paper hanging loops and improvise by sticky-taping string in the centre of the folding baubles (like we’ve done in our Spinning Earth craft), or just threading it through under the paper strips.
The finished DIY paper Christmas ornaments will get you into the holiday spirit and add a bright and festive touch to your Christmas tree.
The full instructions with step-by-step photographs are included in the download as well as below. I’ve also made a video tutorial for people who find that easier.
Printable paper Christmas tree ornament instructions
You will need:
- The template printed to ordinary paper — available both in our printables shop and our TPT store
- Scissors
- Glue stick
- Ribbon or twine for hanging

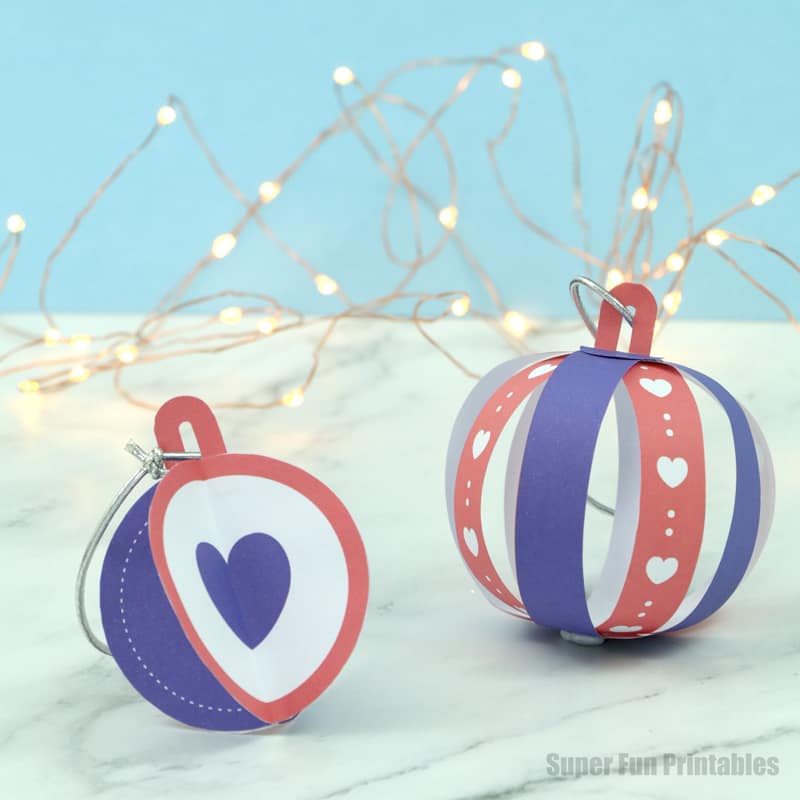
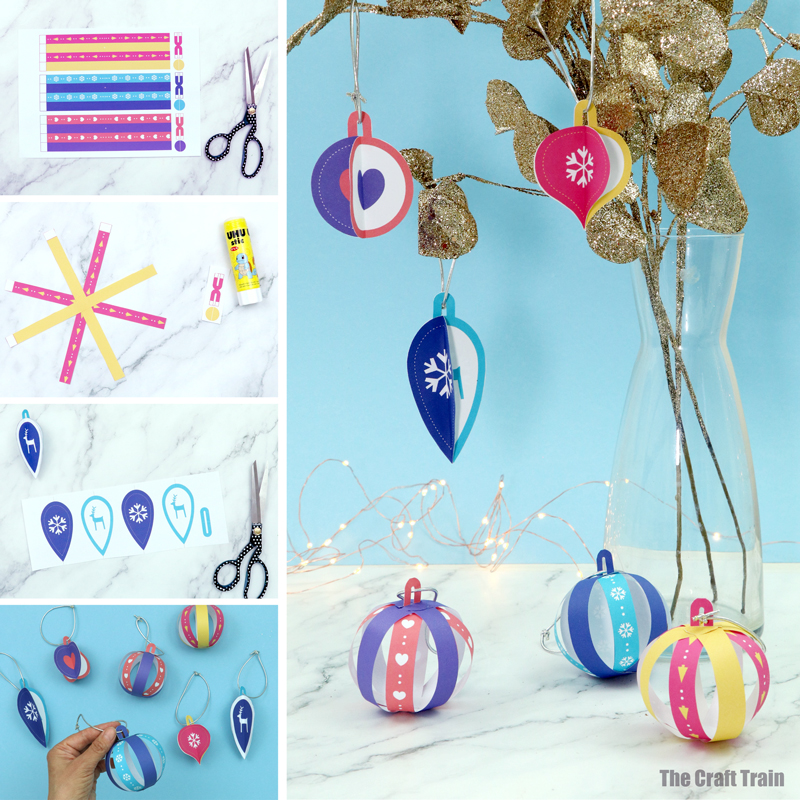
How to make paper strip baubles
Print the coloured strip template to plain paper. If using the black-and-white version, colour your strips with felt-tips, pencils or crayon.
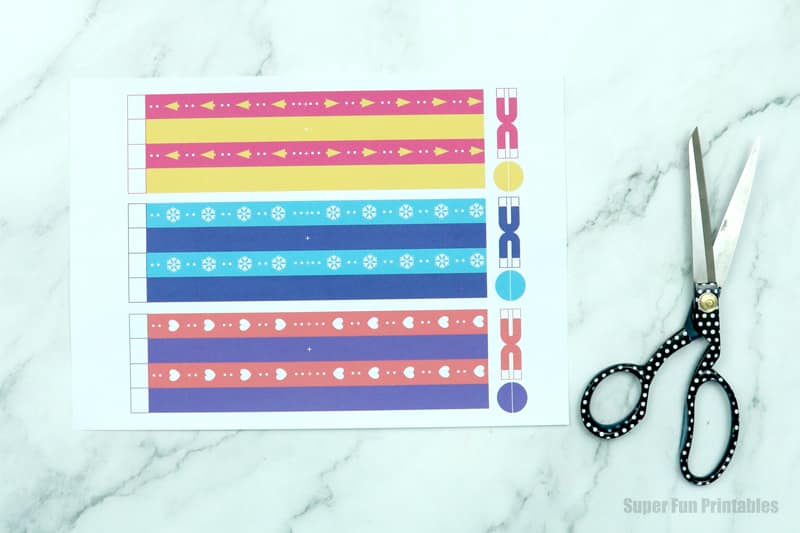
Cut the strips out.
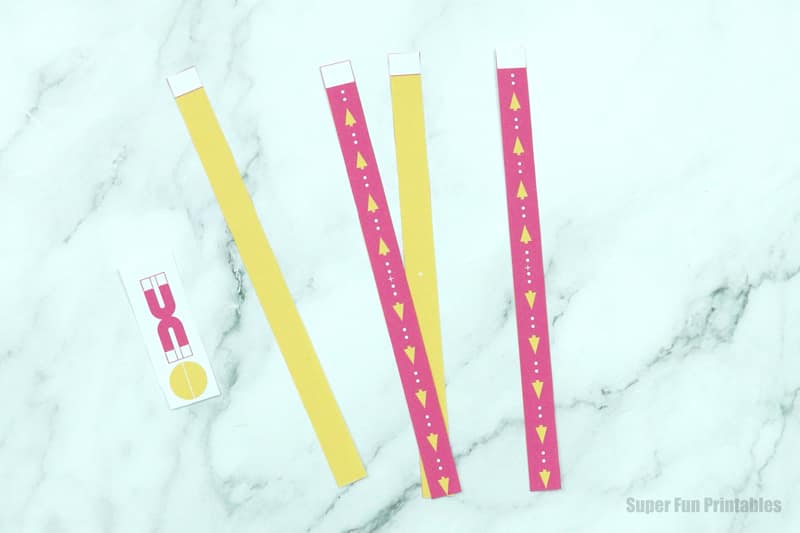
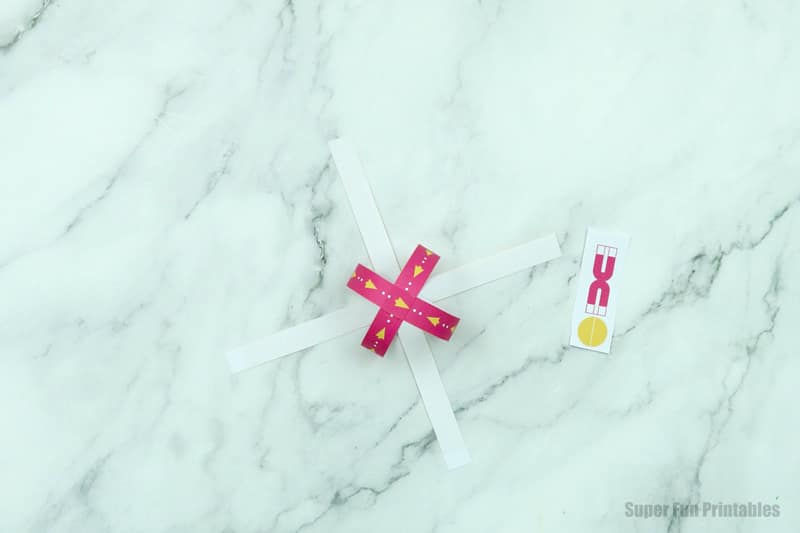
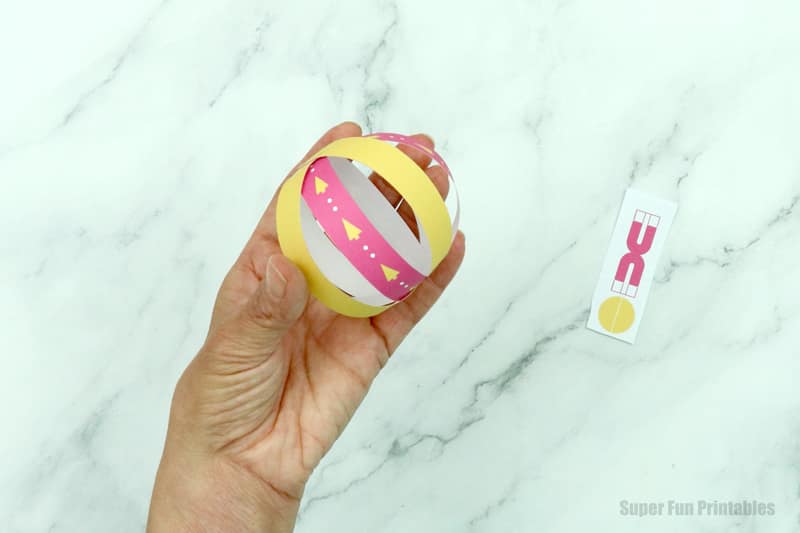
Glue into a star shape by layering the different colours as ‘cross’ shapes so the strips alternate in colour. There are tiny crosses marked on three of the strips to help find the centre. Use the strip of paper without a cross marked as the base strip and fold to get the centre.

Glue on tab and bend into sphere shapes. Do the two patterned strips first, followed by the two plain strips.
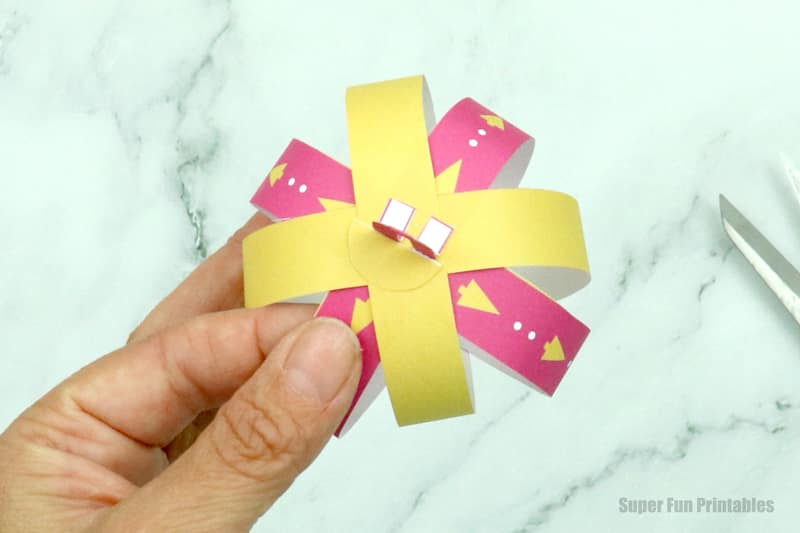
Make the loop for threading. Cut out the arch shape and fold the little white tabs forward. Glue the coloured part back-to-back, being careful not to glue the white tabs.
Thread with string or ribbon. Your baubles are ready to hang!
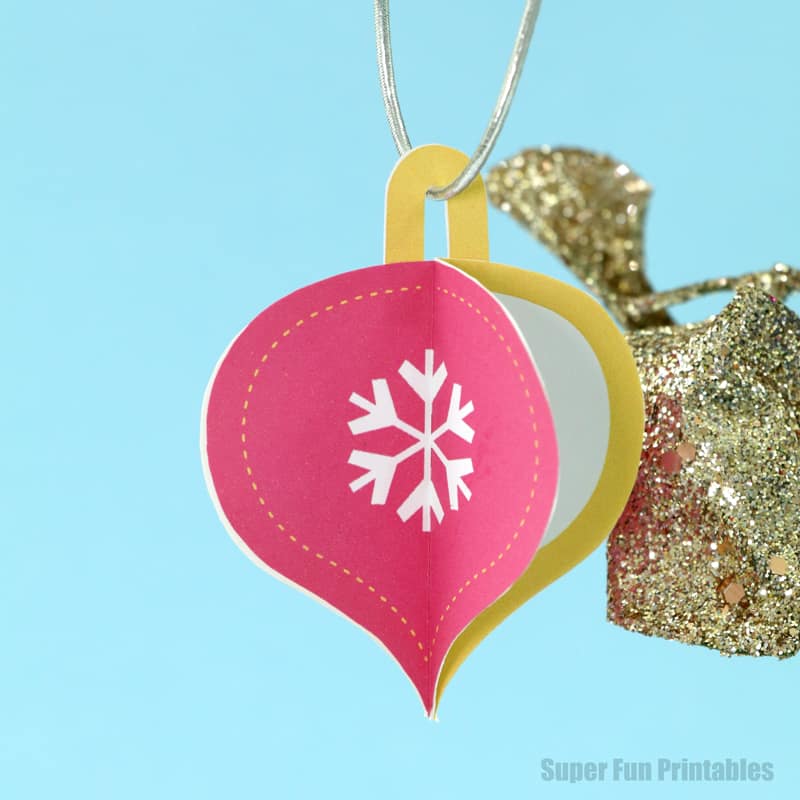
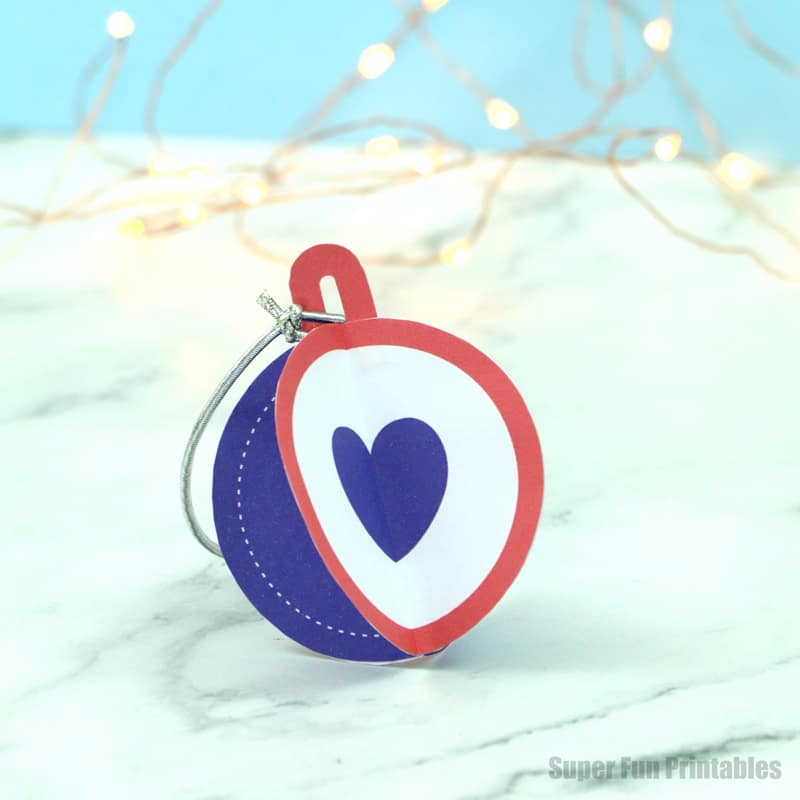
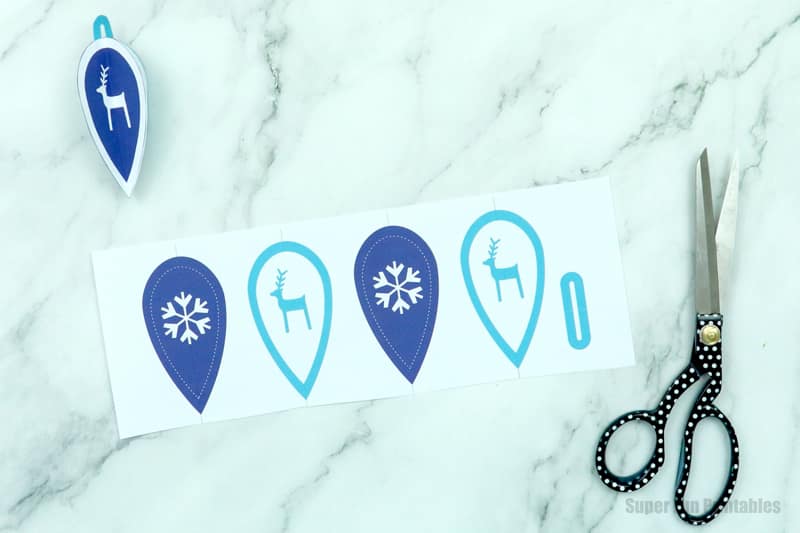
How to make DIY folded paper baubles
Print the template to plain paper. Use a ruler and scoring tool (or blunt butter knife) to make creases in the paper prior to folding. Use the dotted line as a guide. This is for accuracy—it will help make sure your baubles line up well when you glue them together.

Cut the shapes out.

Fold and glue two of the faces together.

Fold the looped shape and glue back-to-back. Cut the white centre out, and glue to white side of the two bauble faces you’ve glued together. It should poke up just above the top of the ornament.
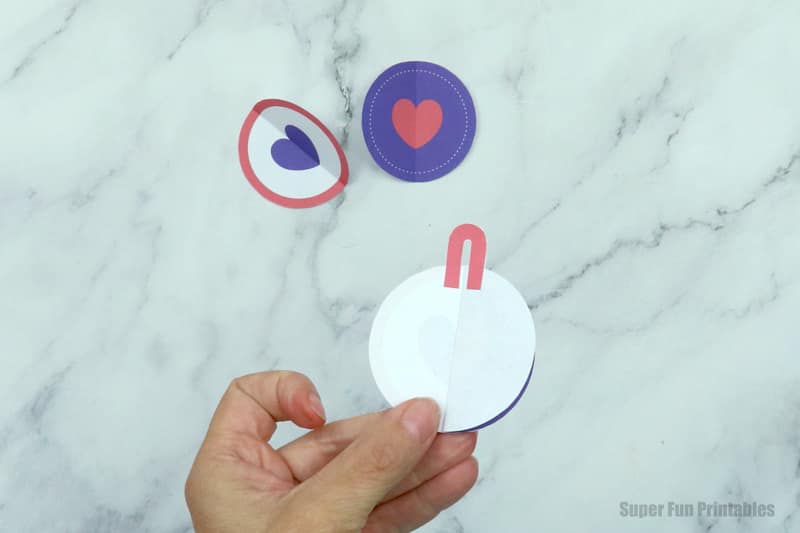
Glue the other two faces into place.
Repeat this technique for the teardrop shaped ornaments.
Tie a piece of string or ribbon through the loops.
Your baubles are ready to hang!
Hope you all have a fun and festive Christmas and enjoy these colorful ornaments.
More easy paper crafts for Christmas:
- Make a winter village from paper cups and our free printable template
- Kids will love jazzing up a 3D Christmas tree with their own creative doodle art
- Here’s a free printable reindeer pillow box for cute and easy Christmas gifts
- Make a super cute penguin card using our printable template

Leave a Reply