Create the most adorable, fluffy pom pom penguin using this printable template. This craft is based on the Gentoo penguin species found on Sub-Antarctic islands.
It’s a fantastic Winter craft idea, perfect for kids who are learning about cold-climate animals and the template comes in both full colour and colour-your own.
Get the template here
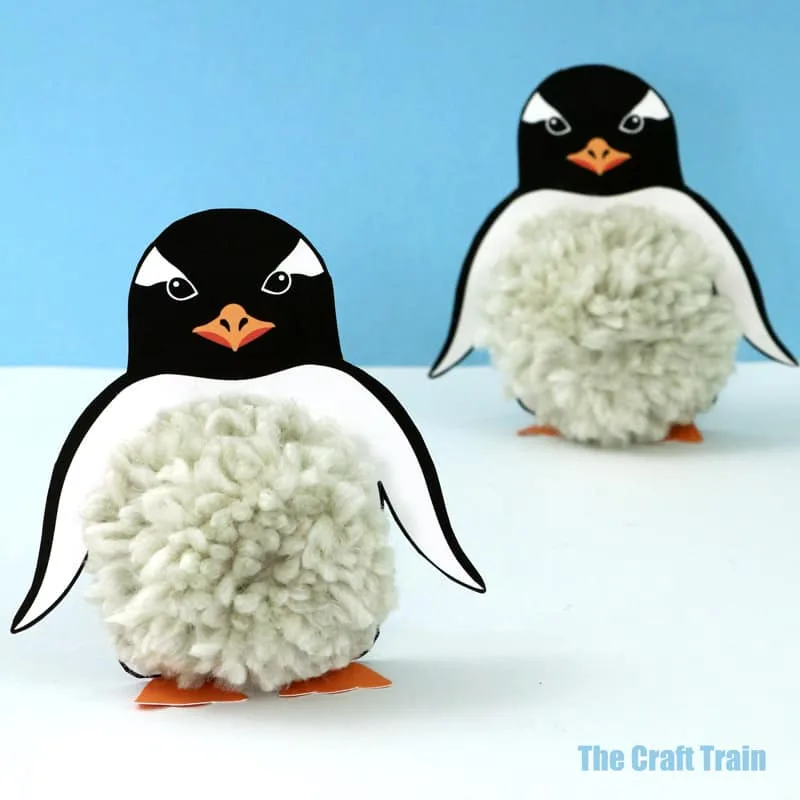
This penguin craft is so simple to make, and I love that it’s based on a real species of penguin. The Gentoos are the ones with white markings near their eyes. In real life, they’re the third biggest species of penguin and can grow to 91cm (36″) tall.
Our printable version is nowhere near as big! You can hold it in your hand and give its fluffy tum a tickle.
This craft is made using a medium-sized DIY pom pom maker. These are quick and easy to make, I promise, and the template for the pom pom maker has been included in the download pdf. You can keep the pom pom maker and use it in other crafts too, like our pom pom chick, hedgehog and goldfish.
Although this craft is very easy, I’ve given it an age rating of 8+ because cutting thick recycled cardboard (like you need to do for the pom pom maker) is tricky for little hands. Likewise, tying knots tightly can be difficult for kids too. However, with a little adult help younger kids could manage this craft no problem.
How to make a pom pom penguin
You will need:
- Thick yarn in light grey or white
- White card stock to print on
- Thick recycled cardboard for the pom pom maker
- Scissors
- Glue stick
- The printable template, available from our printables shop and our TPT store
How to:
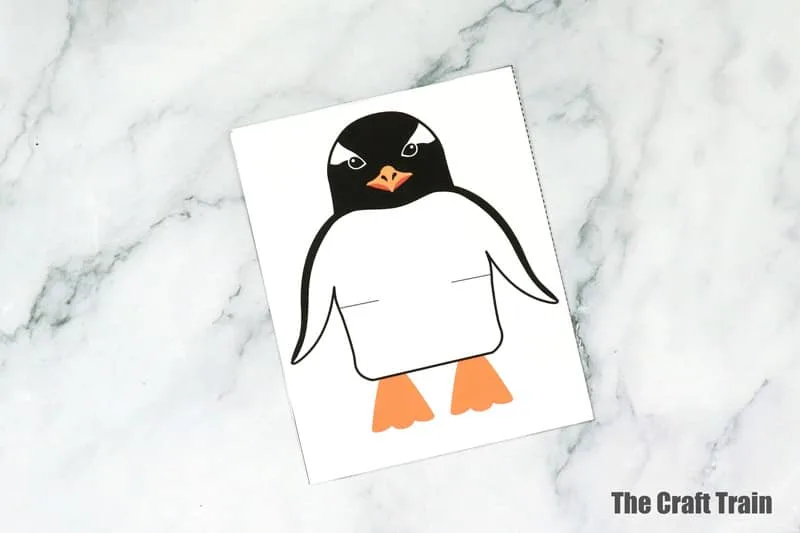
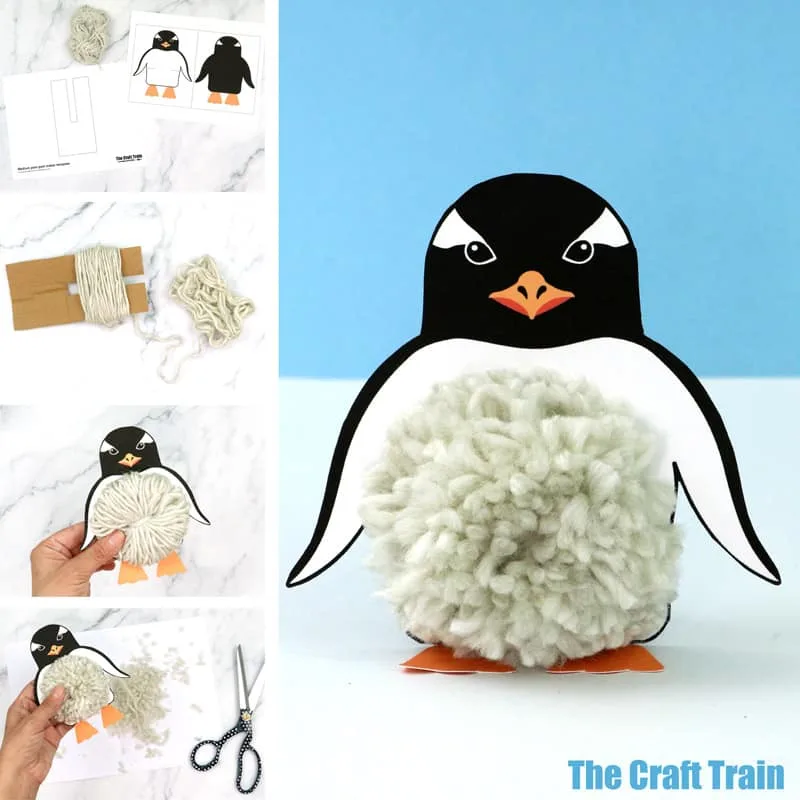
Print the penguin template to card stock and the pom pom maker template to regular paper. Colour the penguin back and front if using the line art version.
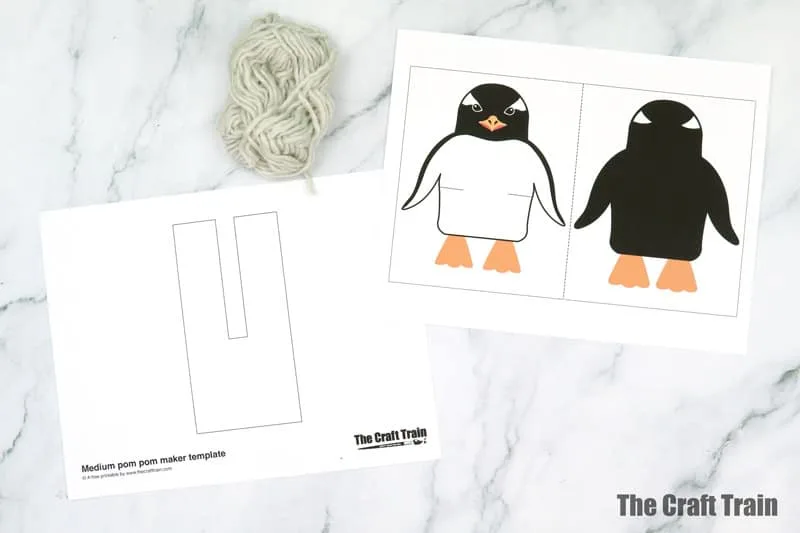
Cut around the outer rectangle of the penguin template. Glue together so you have one double-sided piece of cardboard. Cut around the penguin image on the front to get your finished pom pom frame.
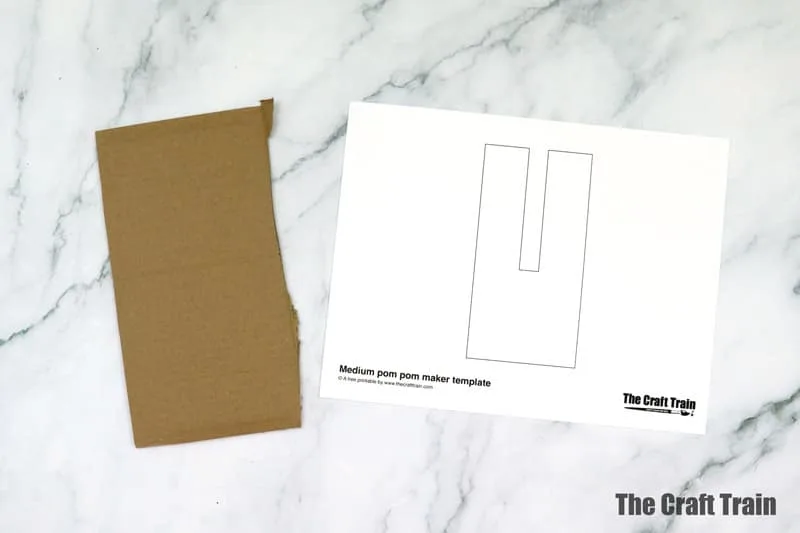
Cut the pom pom maker template out, trace onto a scrap of strong recycled cardboard, then cut the piece of cardboard out. This step may need to be done by an adult if you have small kids because the cutting out can be tricky.
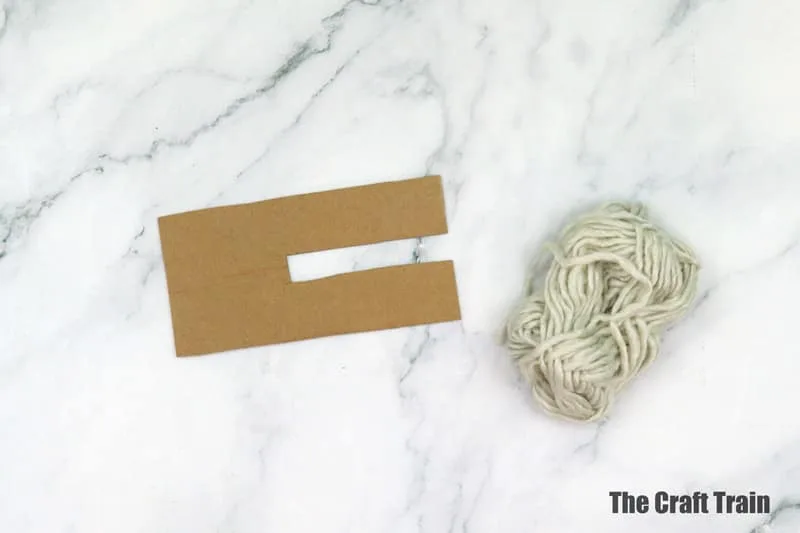
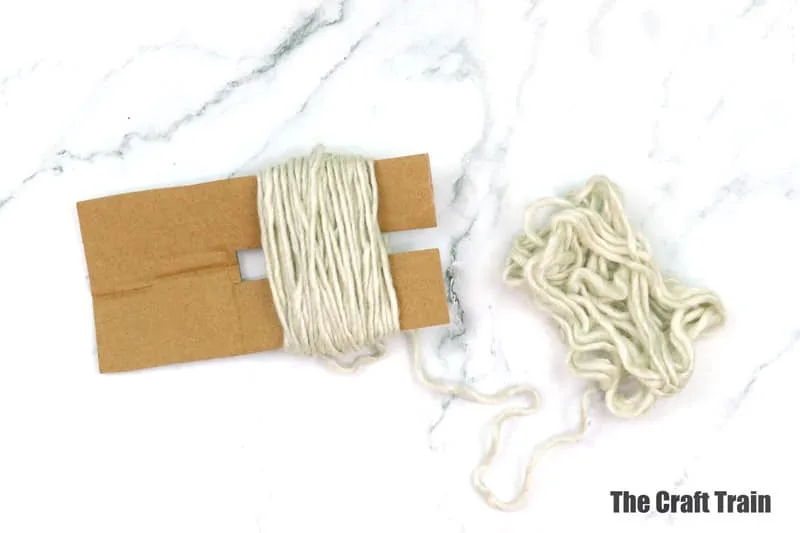
Wind yarn around the pom pom maker until you have a fat bundle. Tie it in the middle, then slide off the pom pom maker. Tie it around the centre again to get the knot as tight as possible. If needed, there are more detailed instructions on how to use the pom pom maker here.
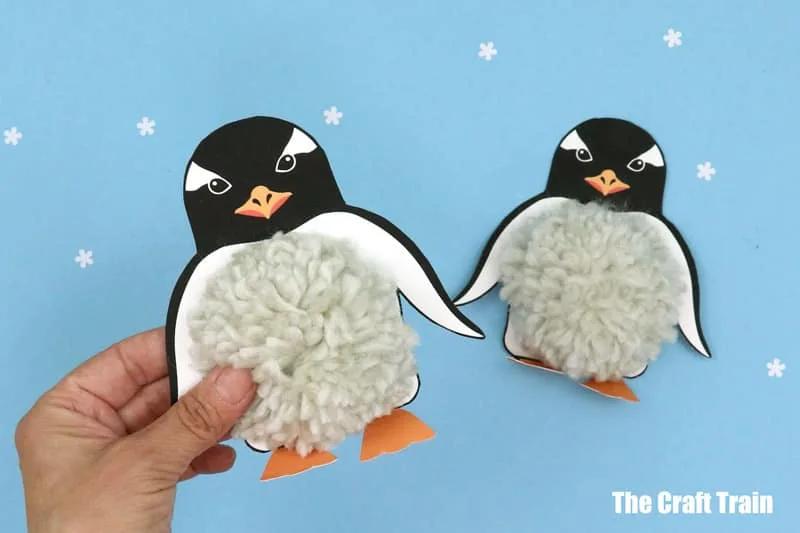
Cut the slits in the penguin’s sides and tie the yarn bundle to the stomach, sliding the ends through the slits and tying a knot at the back.
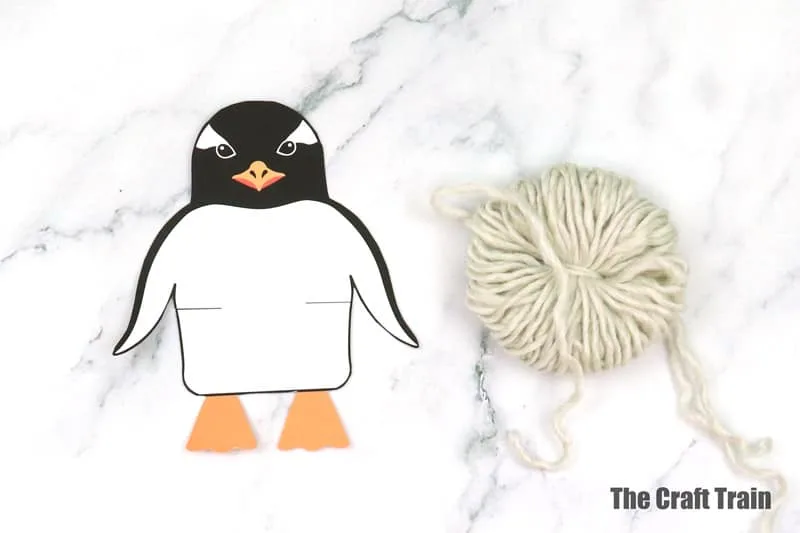
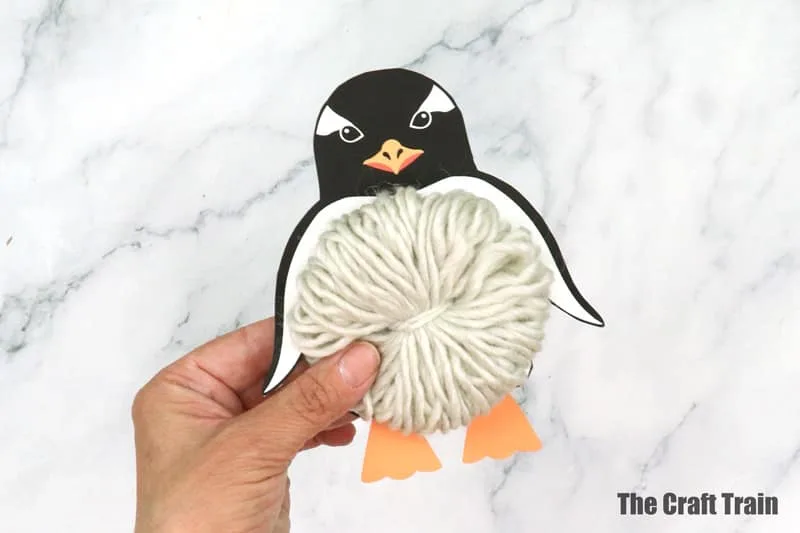
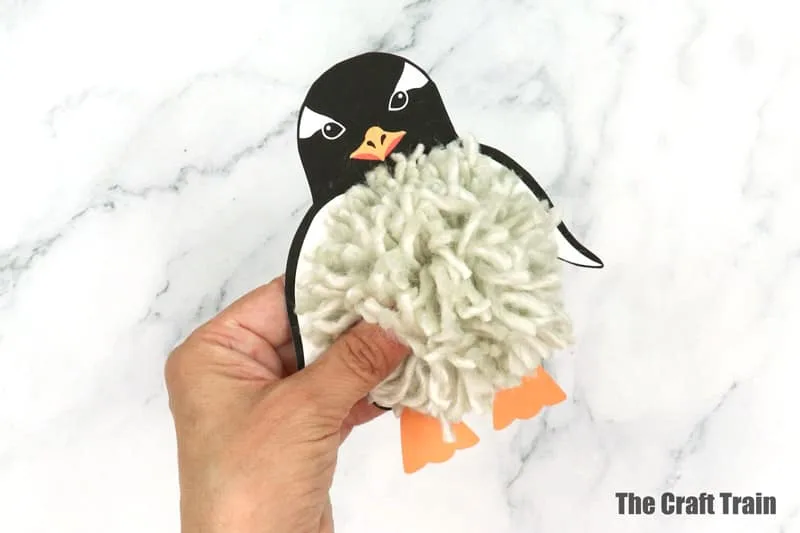
Cut the looped ends to turn the bundle into a pom pom. It will look shaggy.
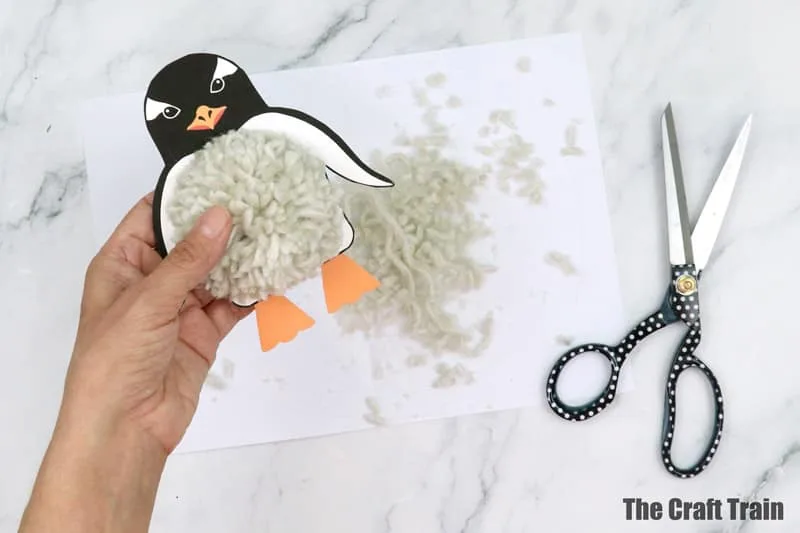
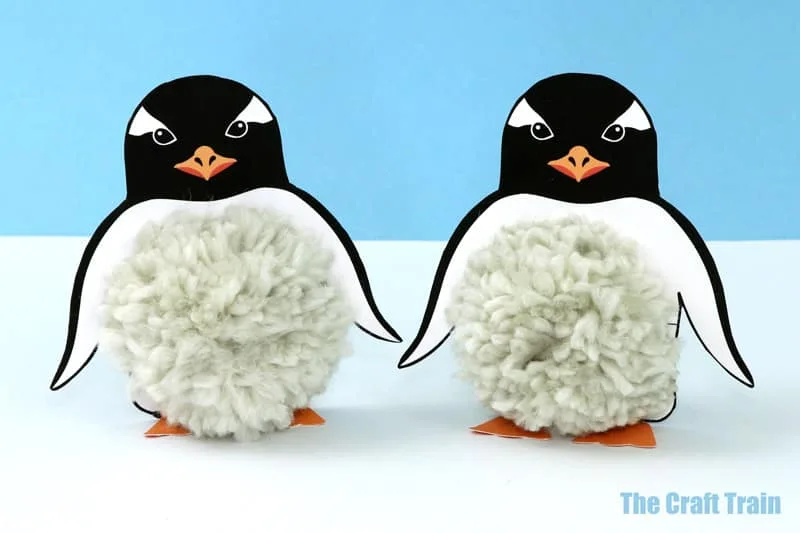
Trim the pom pom and bend the cardboard feet forward. Your finished penguin should be able to stand on its own.
Your finished penguin should be able to stand on its own. What a cutie!
More Winter craft templates for kids

Leave a Reply